GT10
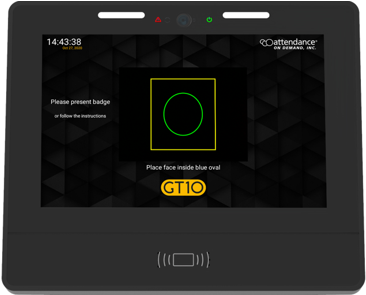
Employees can review the attestation statement for a shift approval by following the steps below:
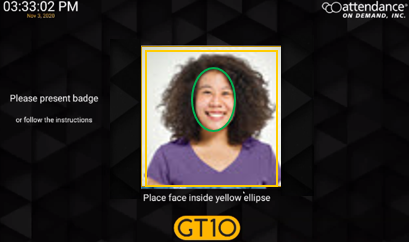
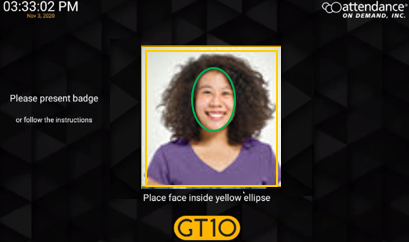
An employee accesses the GT10 clock with face recognition.
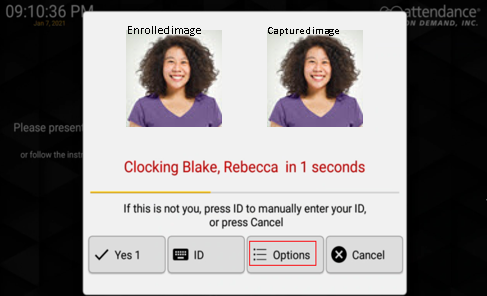
Tap the Options button. The Employee Options screen is displayed.
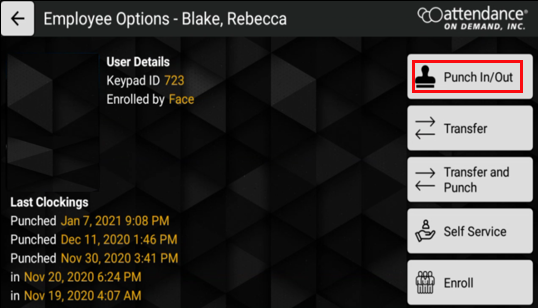
Tap Punch In/Out.
The “Are you ending your shift?” message is displayed. Tap No for the start of shift. Tap Yes for the end of shift.
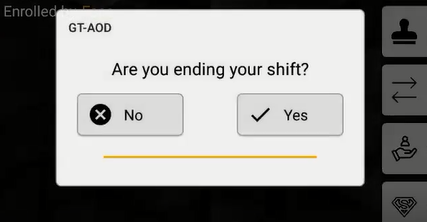
Start of Shift
If you identify your punches as a start of shift, this punch is accepted as an In punch.
The “Please wait contacting server” message is displayed.

The employee In punch is accepted.
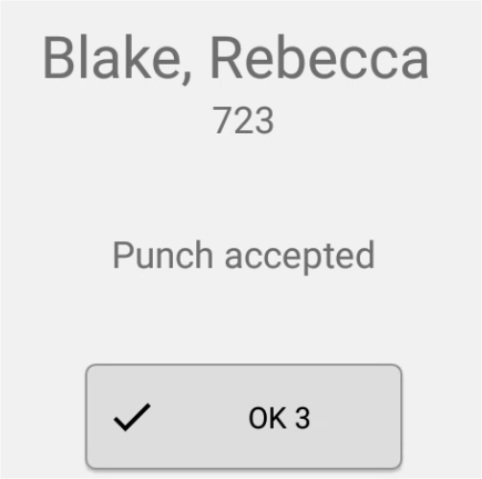
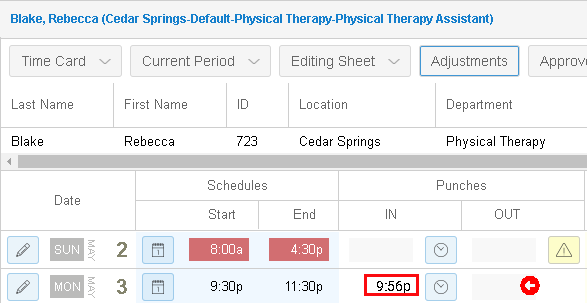
The employee In punch is displayed on the time card.
End of Shift
If you identify your punch as the end of shift, you can attest your work condition and approve your shift.
Approving Work Conditions of a Shift
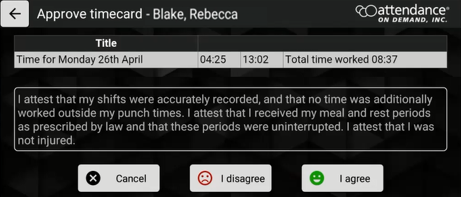
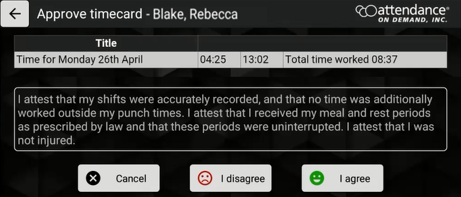
If you agree the following attestation statement regarding the select shift, tap I agree.
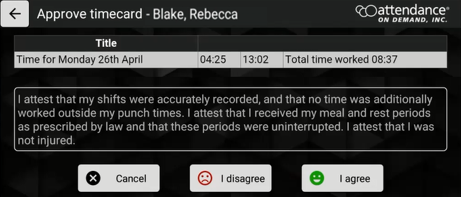
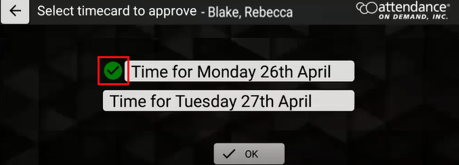
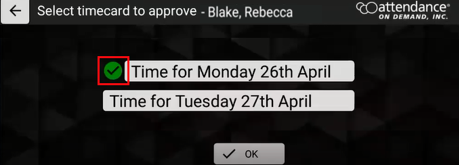
The green checkmark is displayed before the shift. Tap OK.
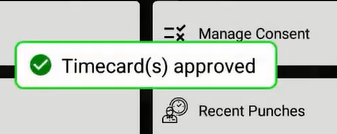
The “Timecard(s) approved” message is displayed.
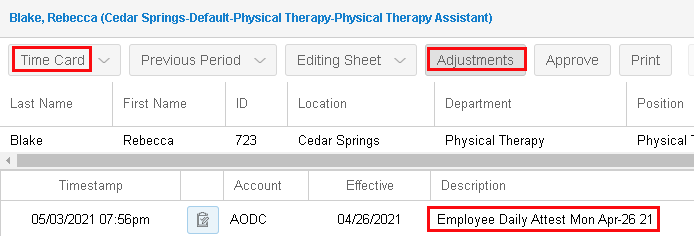
The “Employee Daily Attest” message with the shift date is displayed on the employee time card.
Disapproving Work Conditions of a Shift
If you disagree with the following attestation statement regarding the current shift, tap I disagree.
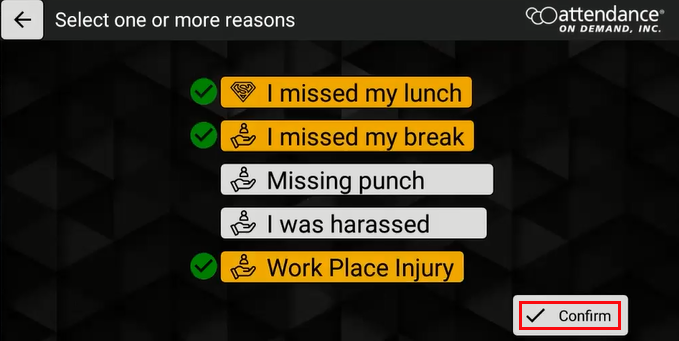
Select one or more reasons regarding the work conditions of selected shift. Tap Confirm.
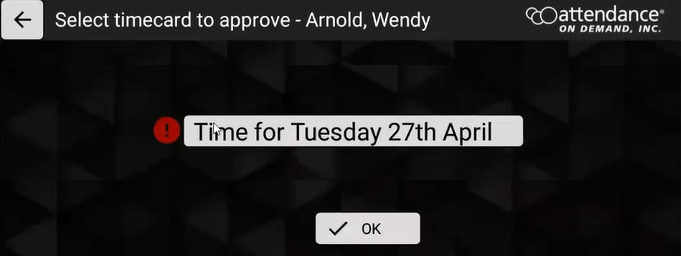
The red exclamation is displayed before the shift. Tap OK.
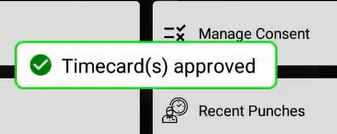
The “Timecard(s) approved” message is displayed.
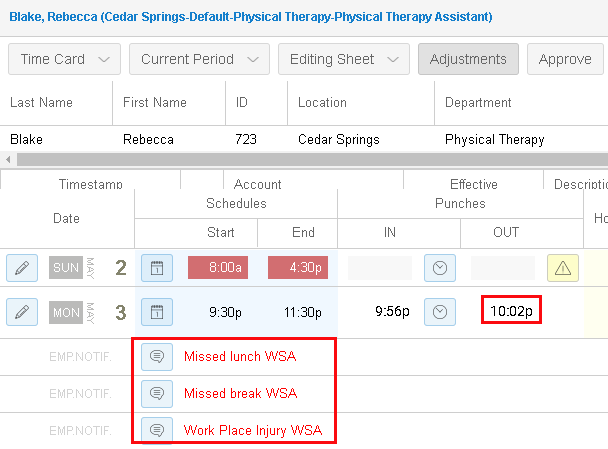
The employee punch is displayed on the time card with the messages “Missed lunch”, “Missed break”, and “Work Place Injury” that reported on GT10.
Download the PDF document Punching In or Out on the GT10 for a printable version of the above steps.
Employees can review the attestation statement to approve a shift by following the steps below:
- An employee accesses the GT10 clock with face recognition.
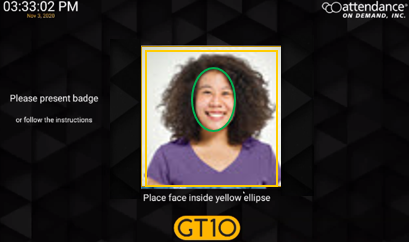
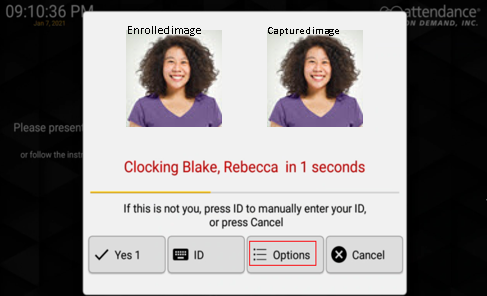
- Tap the Options button. The Employee Options screen is displayed.
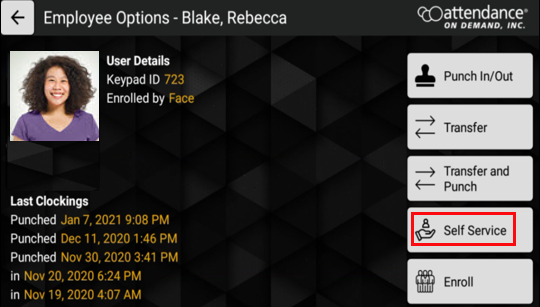
- Tap Self Service to access the employee self-service operations.
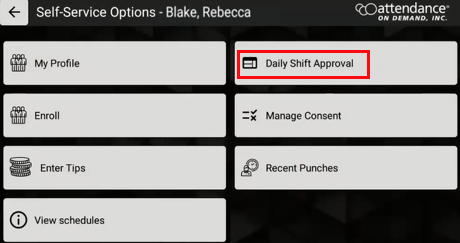
- Tap Daily Shift Approval.
- The “Please wait contacting server” message is displayed to request shifts available in the previous period and current period.

- All shifts in the previous period and current period are displayed.
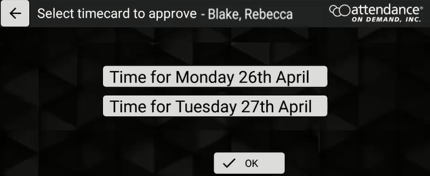
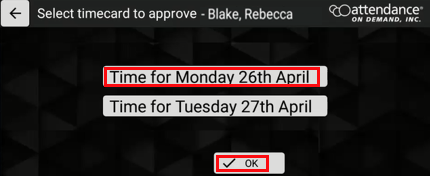
- Select a shift, then tap OK. The Approve timecard screen is displayed for approving or disapproving work conditions of the selected shift. See Approving Work Conditions of a Shift and Disapproving Work Conditions of a Shift for details. To approve another shift, go to step 4.
Approving Work Conditions of a Shift
- If you agree the following attestation statement regarding the select shift, tap I agree.
- The green checkmark is displayed before the shift. Tap OK.
- The “Timecard(s) approved” message is displayed.
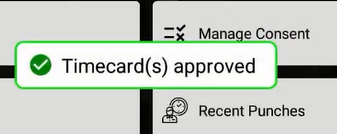
- The “Employee Daily Attest” message with the shift date is displayed on the employee time card.
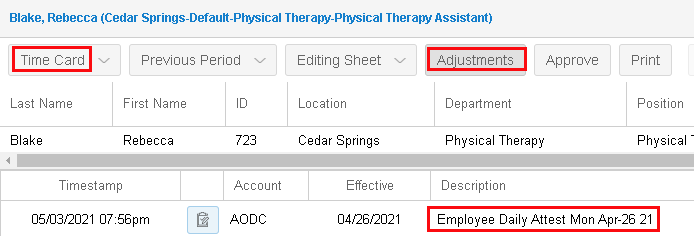
Disapproving Work Conditions of a Shift
- If you disagree with the following attestation statement regarding the select shift, tap I disagree.
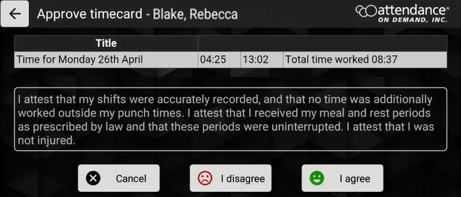
- Select one or more reasons regarding the work conditions of selected shift. Tap Confirm.
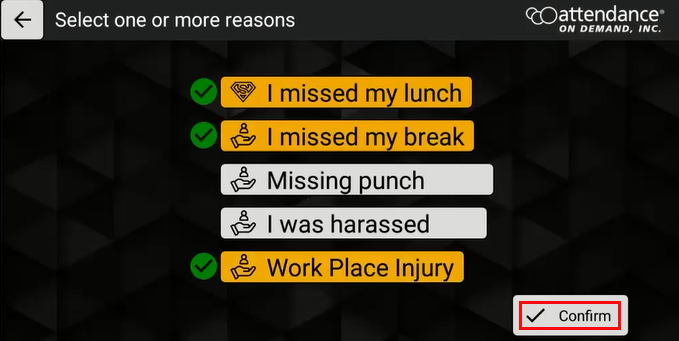
- The red exclamation is displayed before the shift. Tap OK.
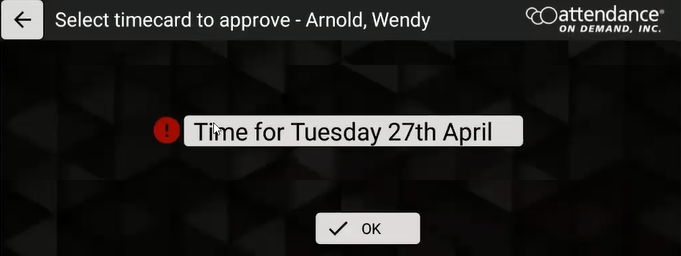
- The “Timecard(s) approved” message is displayed.
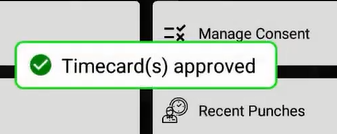
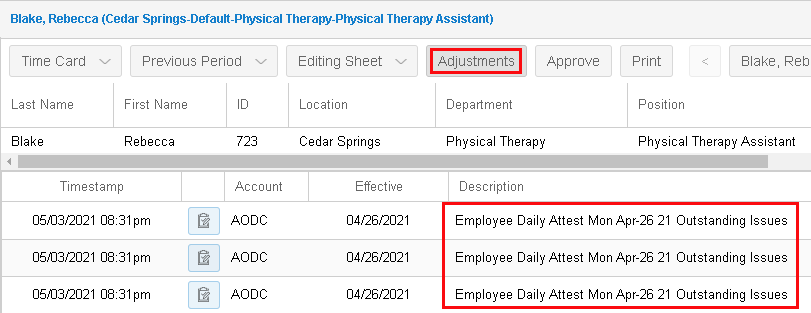
- The “Employee Daily Attest” message with the shift date and the “Outstanding Issues” message are displayed on the employee time card.
Download the PDF document Approving a Shift in a Day on the GT10 for a printable version of the above steps.
Employees can enter tips for themselves by following the steps below:
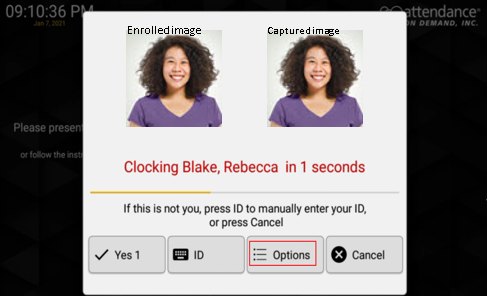
- An employee accesses the GT10 clock with face recognition.
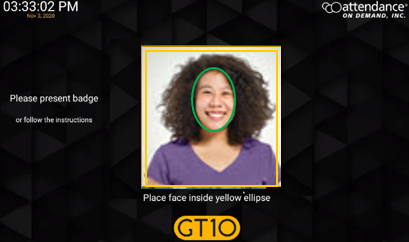
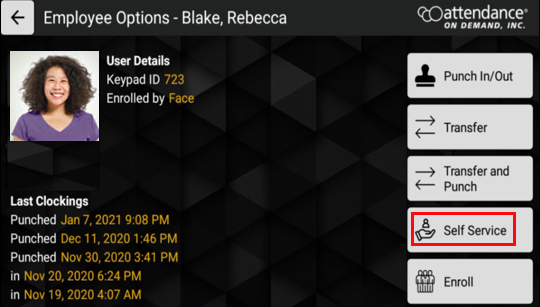
- Tap the Options button. The Employee Options screen is displayed.
- Tap Self Service to access the employee self-service operations.
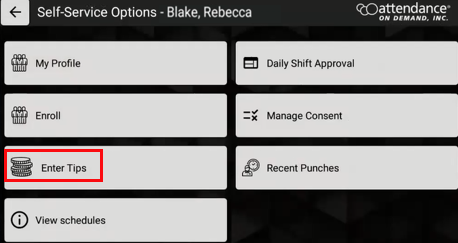
- Tap Enter Tips.
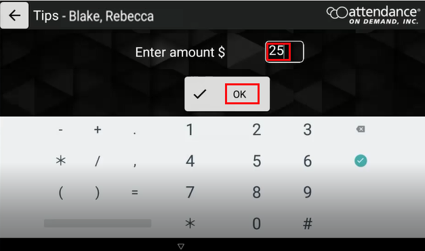
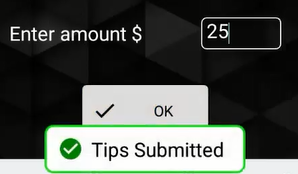
- Enter the dollar amount in the Enter amount field for tip entry. Click OK.
- The “Tips Submitted” message is displayed.
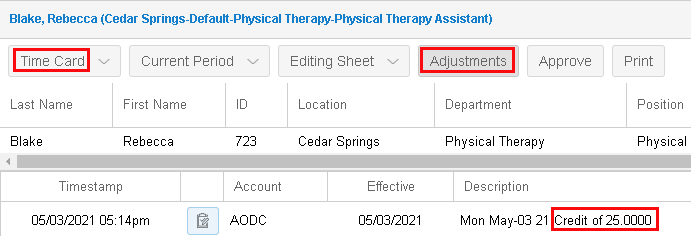
- The entered tips are displayed on the employee time card.
Download the PDF document Entering Tips on the GT10 for a printable version of the above steps.
Employees can view their following four days’ working schedules.
- An employee accesses the GT10 clock with face recognition.
- Tap the Options button. The Employee Options screen is displayed.
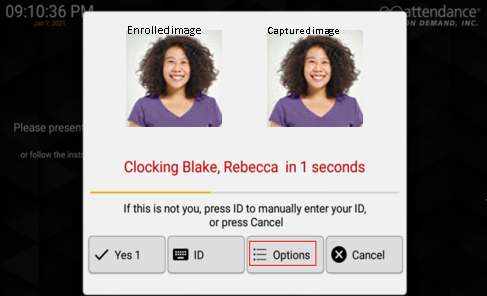
- Tap Self Service to access the employee self-service operations.
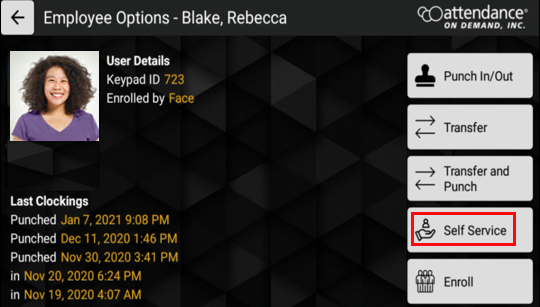
- Tap View schedules.
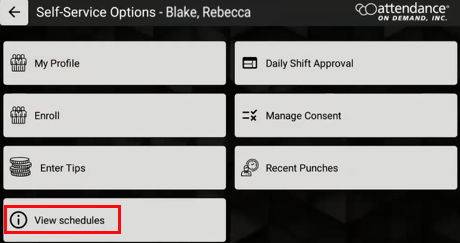
- The employee working schedules with their dates, start times, and end times are displayed.

Download the PDF document View Schedules on the GT10 for a printable version of the above steps.