Accounts
When adding a user account in Manager Self Service (MSS), you will need to define some basic operator properties and the operator’s workgroup access rights.
Watch the video below on how to add a user account.
- Click the Manage Accounts menu item.

- Click the Add Account button.
- Enter the user’s name in the Add New User Account window.
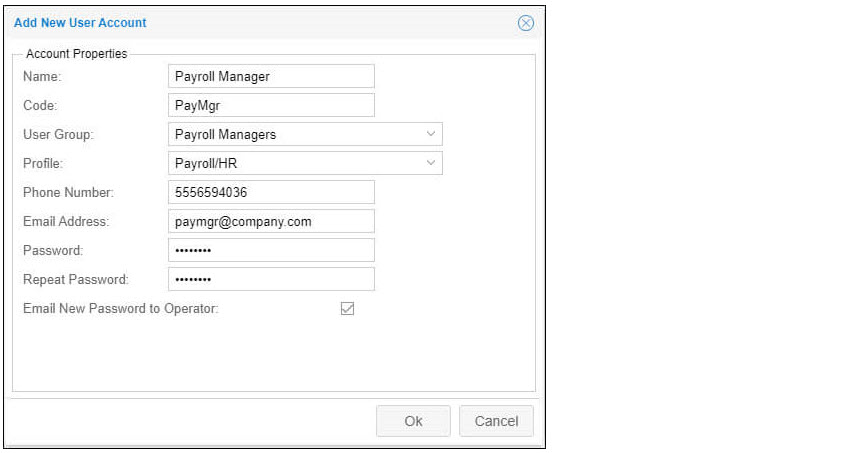
- Enter the user’s account code (cannot exceed 10 characters).
- Select the appropriate user group.
- Select the appropriate profile.
- Enter the user’s phone number (if needed).
- Enter the user’s email address.
- Enter the user’s password.
- Confirm the user’s password
- Enable the Email Password to New Operator checkbox (this will send the user’s invitation to their assigned email address).
- Click OK.
After creating the new user account, you will want to follow the steps below to assign the appropriate level of access
- Click the Basic Operator Properties drop down menu.
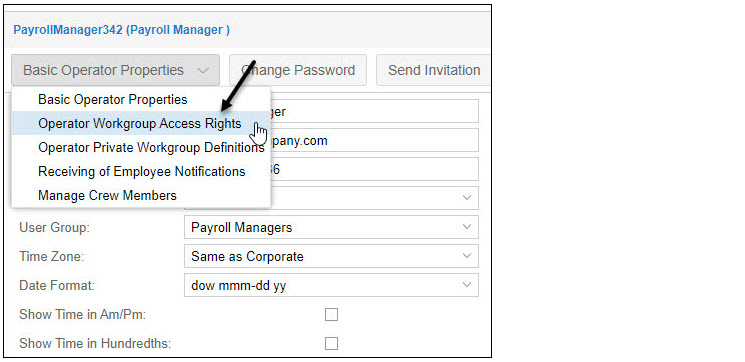
- Click Operator Workgroup Access Rights.
- Click the Add New button.

- Click on the All/Home for the Workgroup levels that need to be changed for the user’s level of access.
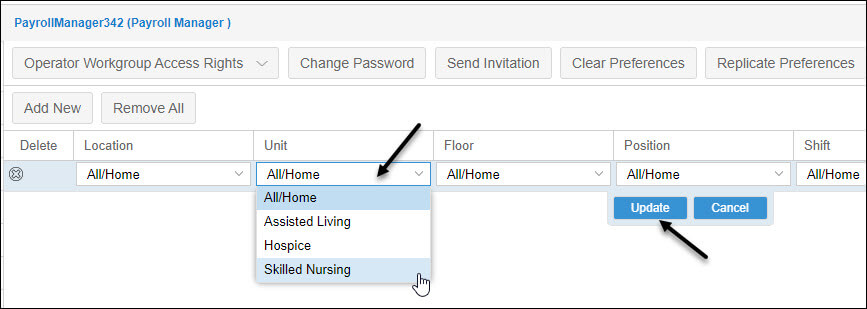
- Click Update.
See Adding a User Account for details.
A user account determines how a user logs in to the system, the functions they can perform, and the workgroups they can manage. If you can access other users’ account information, you may want to remove a user account if this account is not used.
See Removing a User Account for details.
Operator workgroup access rights determine which employees the user can see and access transactions for in Manager Self Service. Access is determined by the workgroups added to the user account profile. Workgroups can be added or changed in the Manage Accounts page.
To change workgroups for a user account:
- Click the Manage Accounts menu item to view a list of the user accounts.
- Click the Pencil icon for the user account you want to update.
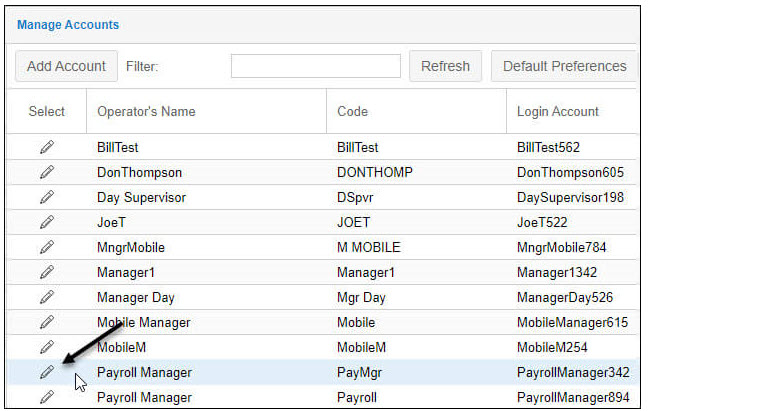
- Click the Basic Operator Properties drop-down list and select Operator Workgroup Access Rights.

- Select the workgroup levels that need to be changed to define the new workgroup or add a new workgroup by selecting the Add New button.
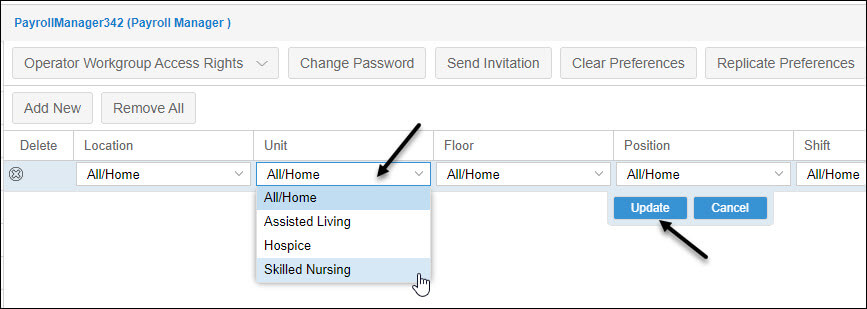
- Click the Update button.
See Managing a User Account for details.
You may want to change your password to ensure the security of your MSS3 login credential.
See Changing Your Password for details.
You can select the employees you want to receive leave request and attendance issue related notifications from in Manager Self Service (MSS). The list of employees is maintained on a per user basis within workgroups. You can select how you will receive notifications for each user: Never, Filtered, or Always. To access the list of employees:
- Access your account page by clicking the people icon.
- If the setting for users to receive employee notifications is enabled in your system, select the ‘Receiving of Employee Notifications’ option from the drop-down list.

- Expand the hierarchy workgroup structure and locate the specific workgroup. Employees who belong to the selected workgroup are populated in the right panel.

- Set the notification status for an individual employee using the Never, Filtered, or Always check boxes. The settings apply as follows:
Operation Descriptions Never You will not receive notifications for employees in this workgroup. Filtered You will receive notifications for employees in this workgroup based on your technicians’ configuration selection in the system. For example, only the first matched user receives the notification or every matched user receives the notification. Always You will always receive notifications regarding employees in this workgroup.
Click the Never, Filtered or Always header to apply that setting to all of the employees in the workgroup.
See Receiving Employee Notifications for details.
Crew is a list of employees unique to the specific user and managed in the Accounts page.
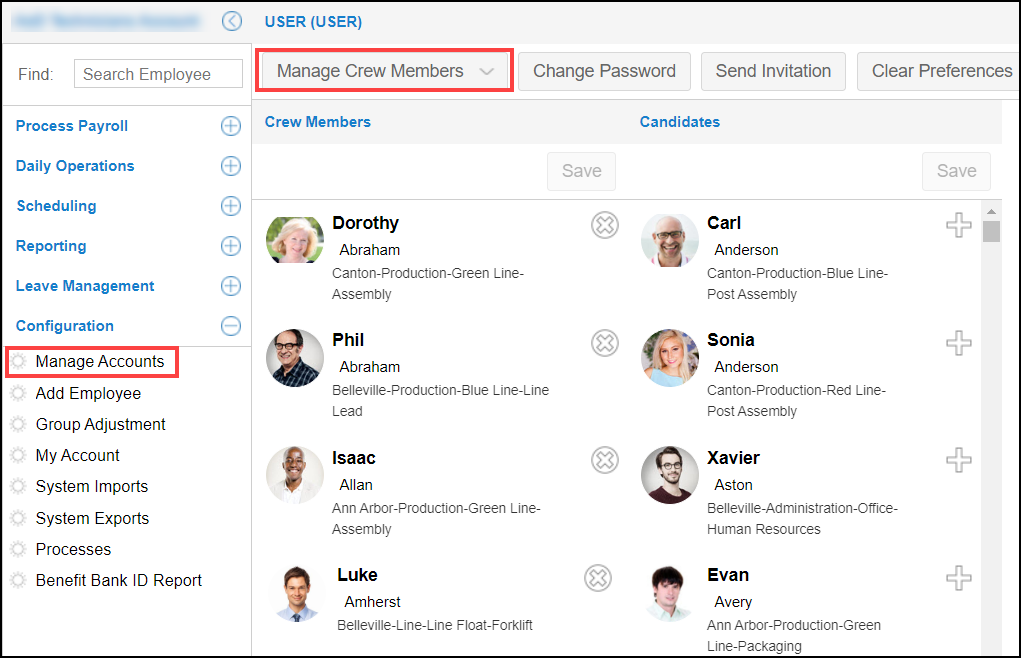
To manage your crews:
- Click Manage Crew Members in the Basic Operator Properties dropdown list.
- You can add an employee from a candidate list as your crew or remove a crew member from the Crew Members list.
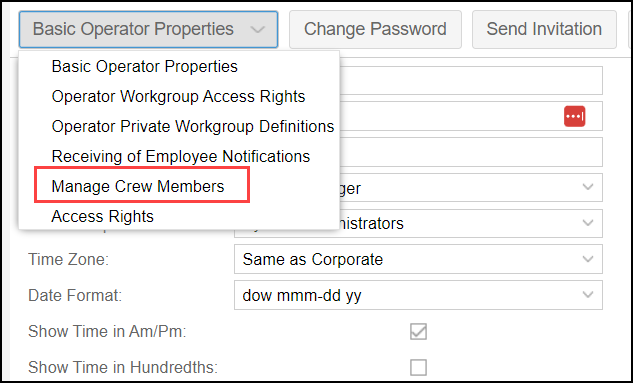
To Add a Crew Members:
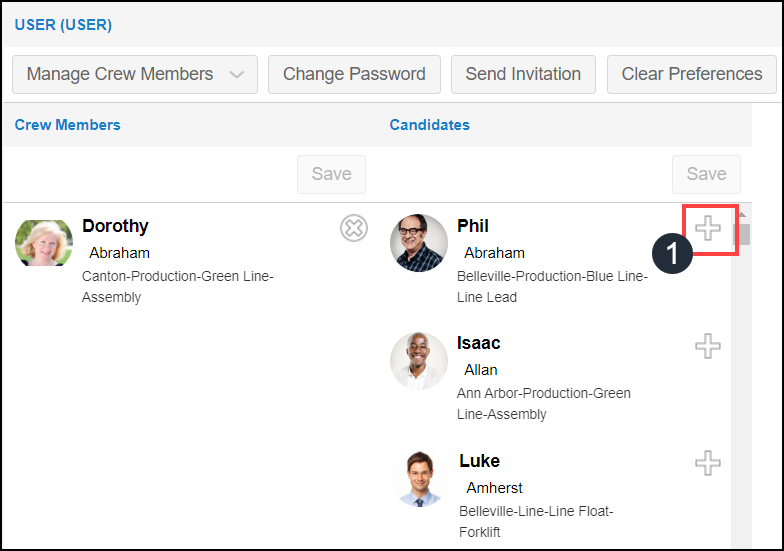
- Click the Plus sign (+) for an employee in the Candidates list.
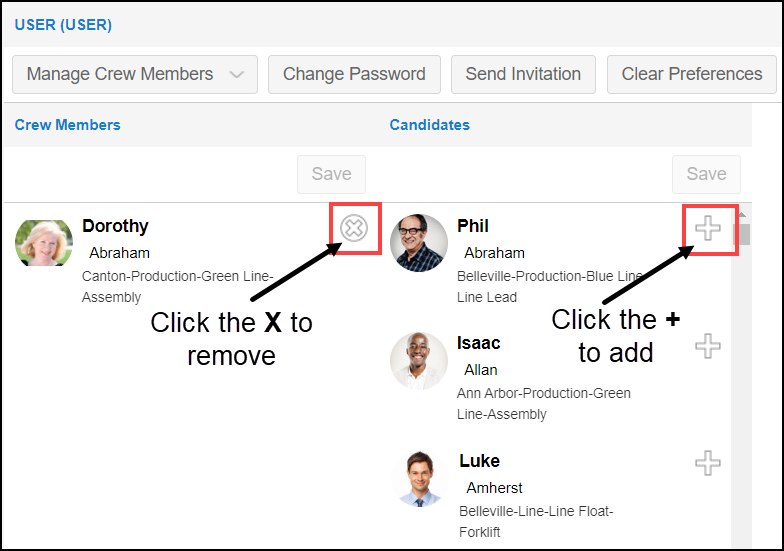
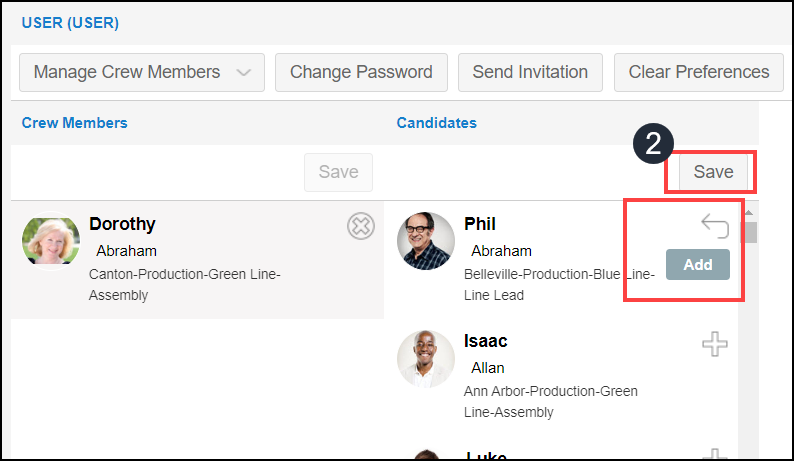
- After clicking the Plus sign, an Add tag is added and an Undo sign is shown. Click Save to confirm your selection of crew members to be added. You can click the Undo sign to cancel the Add operation.
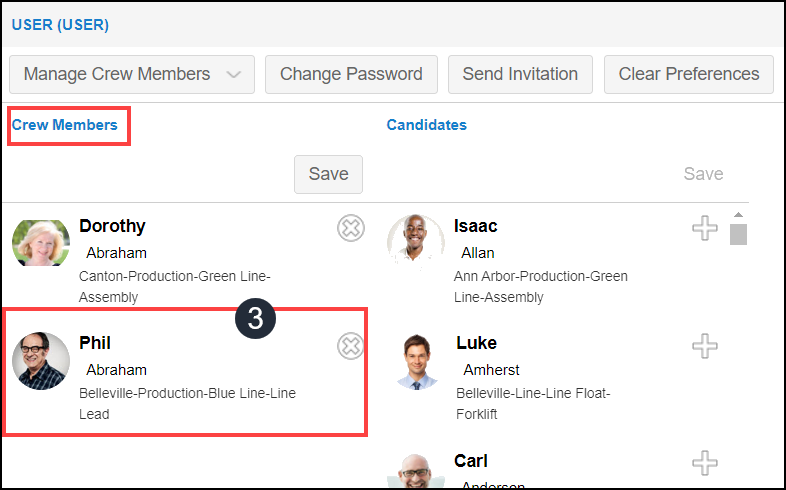
- The candidate is removed from the Candidates list and added as a crew member in the Crew Members list.
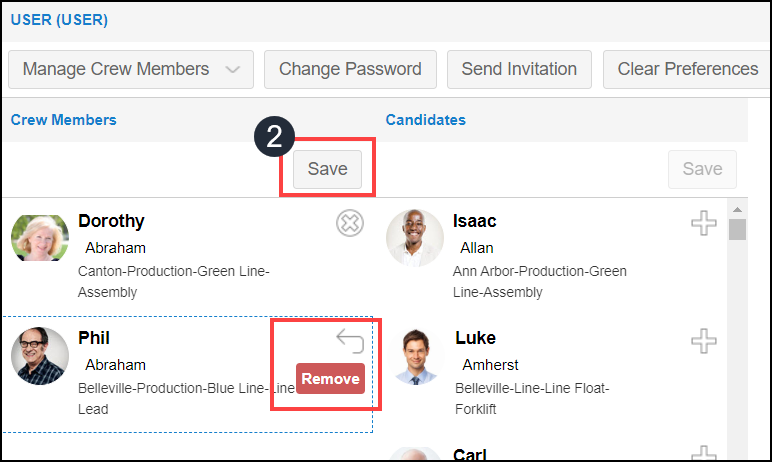
To remove a crew member:
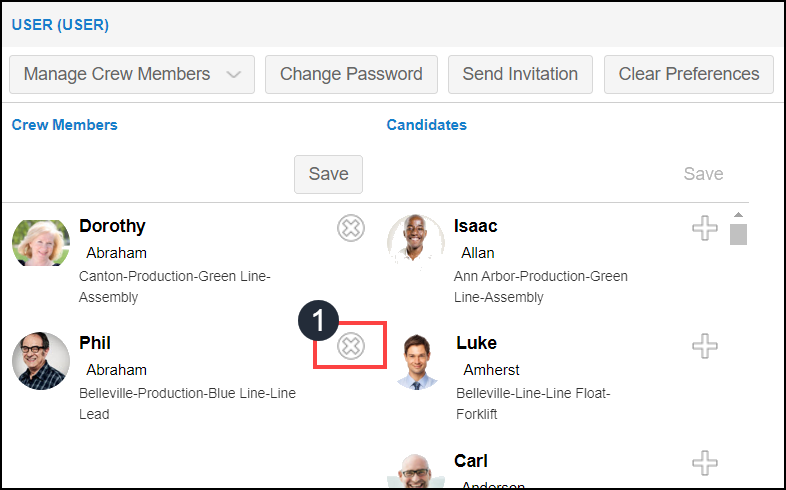
- Click the Cross sign (X) for a crew member in the Crew Members list to be removed.
- After clicking the Cross sign, a Remove tag is added and an Undo sign is shown. Click Save to confirm your selection of crew members to be removed. You can click the Undo sign to cancel the Removal operation.
- The candidate is removed from the Crew Members list and added as a candidate in the Candidates list.
See Managing Crew Members for details.