Employee Management
You can add a new employee to your database using the Add New Employee operation.
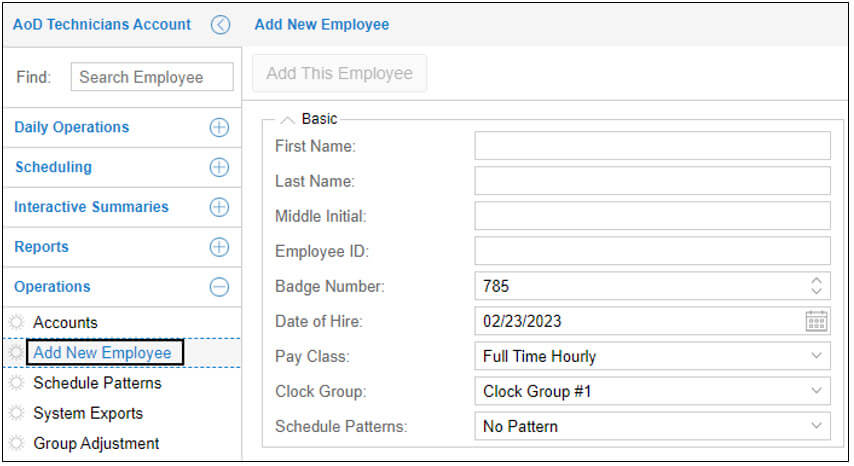
For more information about adding a new employee, download the PDF document Adding a New Employee.
LTC clients usually compile spreadsheets manually and file direct care hours of agency or contract workers for PBJ purposes. The time and attendance software allows a generic placeholder employee to be created for last minute contracting of new agency workers to arrive onsite and punch at the clcck immediately.
You can add placeholder employees using the Add Employee operaton and adjust the sensitivity threshold to accept all fingers. Then you can modify properties of the placeholder employee with the information of the agency worked like first name, last name, workgropu assignement and more.
To add a placeholder employee for agency employees:
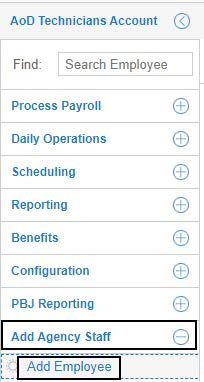
Click the Plus sign to expand Add Agency Staff menu group and select the Add Employee menu item.
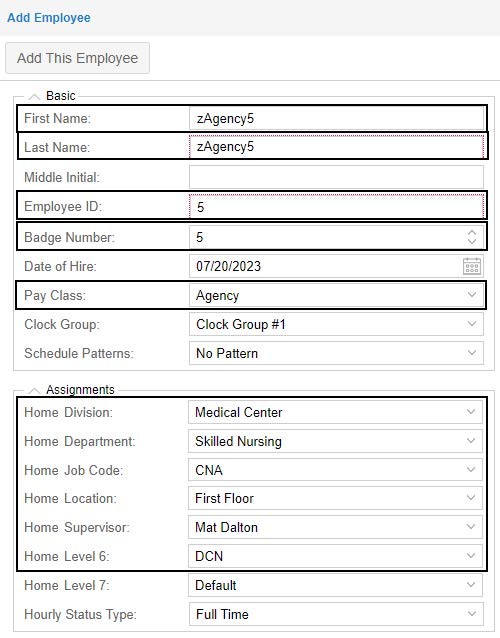
Specify the following properties when a placeholder employee is added.
| Property | Descriptions |
|---|---|
| First Name | Enter zAgency1, zAgency2, zAgency3 etc. for placeholder purpose so that new agency workers can immediately punch upon arrival to the facility. |
| Last Name | Enter zAgency1, zAgency2, zAgency3 etc. for placeholder purpose so that new agency workers can immediately punch upon arrival to the facility. |
| Employee ID | Enter the employee id for the placeholder employee. |
| Badge Number | Enter the badge number for the placeholder employee. |
| Pay Class | Select Agency in the Pay Class drop-down list. |
| Assignments | Select a workgroup for each workgroup level. |
The employee is added with the detailed information displayed on the right side.
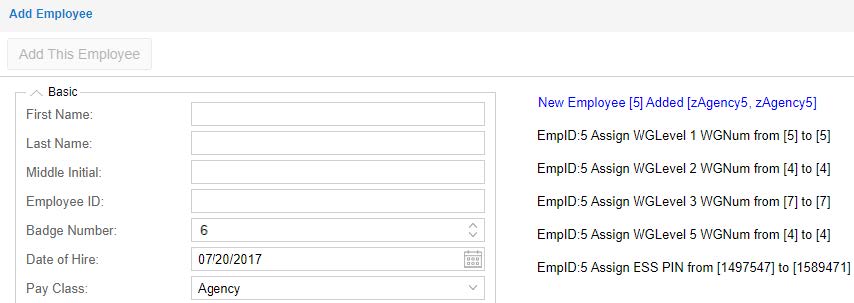
Repeat steps 1 to 3 to add more placeholder employees.
Enroll Your Finger Template for Placeholder Employees
Supervisor can temporarily enroll her/his finger template for all placeholder employees and adjust the sensitivity threshold for them with None, Accept Any Finger to accept any finger.
Enter agency in the Find field to locate all placeholder employees. Click an agency entry to drill down to this employee’s pages.

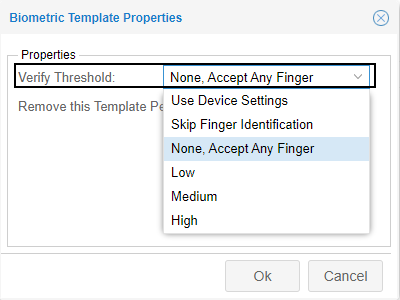
Select Personal Information in the first page drop-down list. Then select Templates in the second drop- down list. Click “Finger I/V Template”, the Biometric Template Properties dialog is displayed.
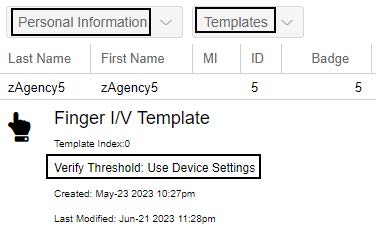
Select None, Accept Any Finger in the Verify Threshold drop-down list. Click Ok.
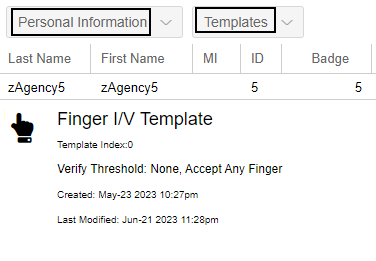
The Verify Threshold is updated with the selected None, Accept Any Finger.
Repeat step 1 to 4 to adjust sensitivity threshold for all placeholder employees.
Replace Placeholder Employee Properties for Agency Workers
To replace placeholder employee properties by those of Agency workers:
Enter zagency in the Find field to locate all placeholder employees. Click an agency entry to drill down to this employee’s pages.

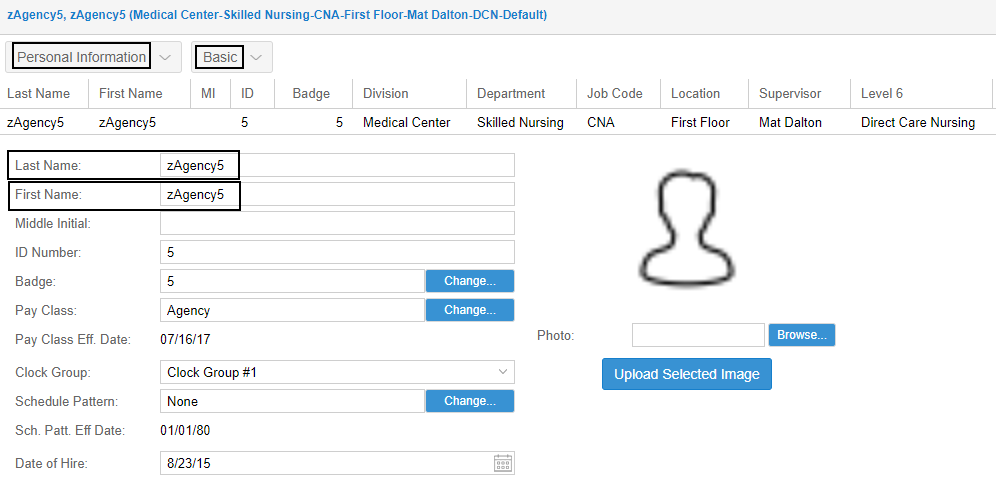
Select Personal Information in the first page drop-down list. Then select Basic in the second drop-down list. You can modify the Last Name and First Name fields with the real name of the agency worker.
Select Workgroup in the second drop-down list. Then click the Pencil icon for the current workgroup assignment. The Adjust Current Home Workgroup Settings dialog is displayed.

Modify the workgroup for each workgroup level for this agency worker. Click Ok.
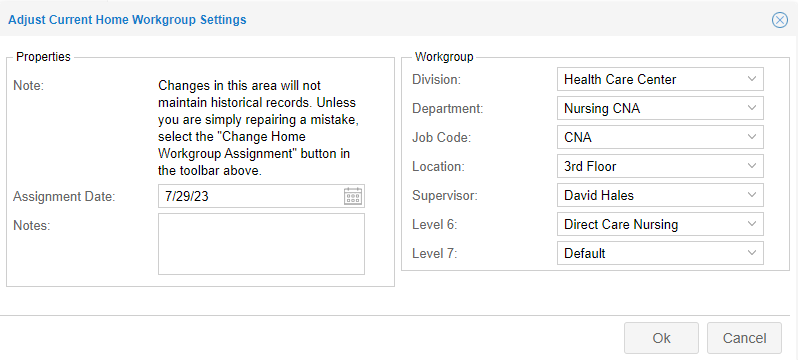
The current workgroup assignment is updated.

Repeat step 1 to 5 to replace placeholder employee properties with those of other agency workers.
For more information about adding a new employee, download the PDF document Adding Placeholder Employees for Agency Workers.
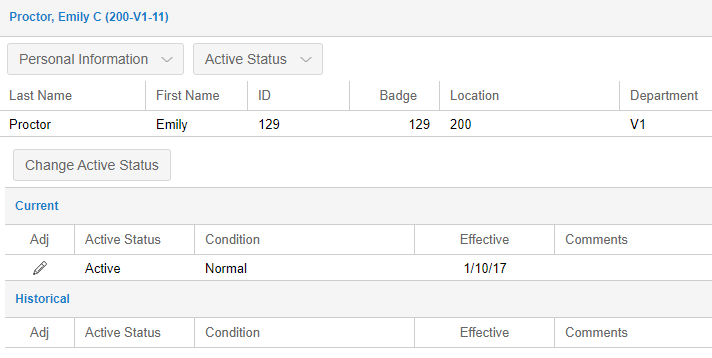
When an employee no longer works for a company, their employment is terminated. You must change their active status in their Active Status section of the Personal Information page by indicating the terminated condition and effective date. The terminated condition tracks why an employee is no longer employed, and can be used to determine whether a terminated employee is eligible to be rehired. Typical terminated status types are Disciplinary Action, On Leave, and Permanent.
You can terminate an employee in your system by following the steps below:
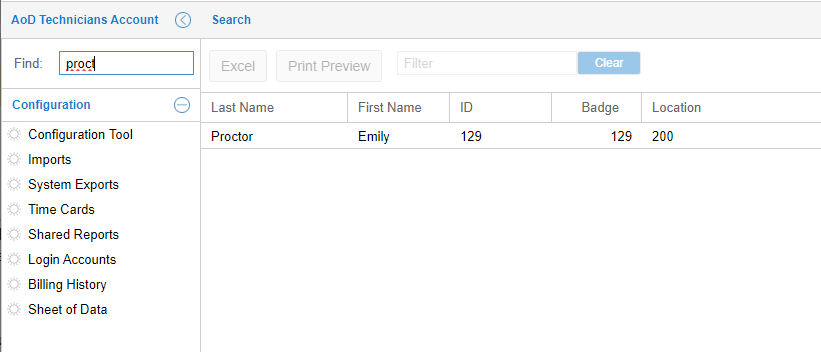
- Locate the employee record using the Find field. Type all or part of the employee’s name.
- Hit Enter on your keyboard.
- Click the employee’s name in the list of results returned by the employee search.
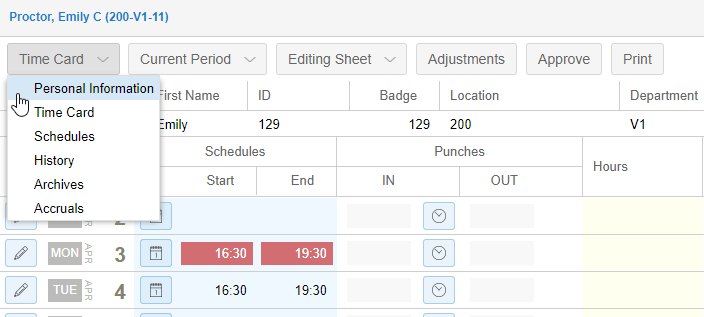
- In the employee’s time card, select Personal Information from the Time Card drop-down list.
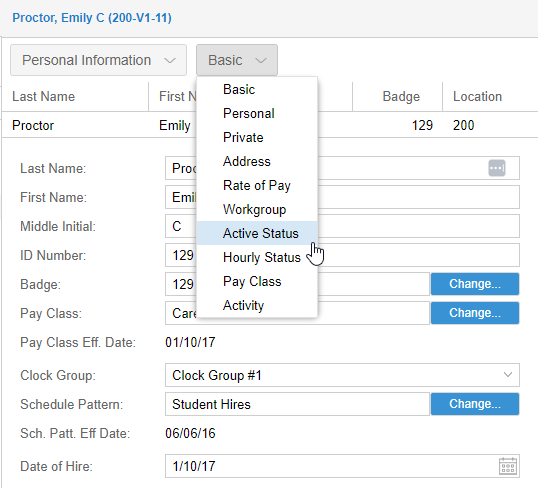
- Select Active Status from the Basic drop-down list.
- Click the Change Active Status button in the Active Status page.
- Select Terminated in the Active Status drop-down list in the Assign New Active Status window.
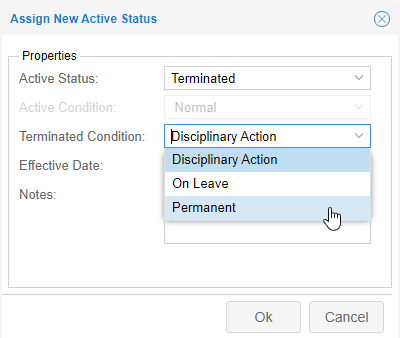
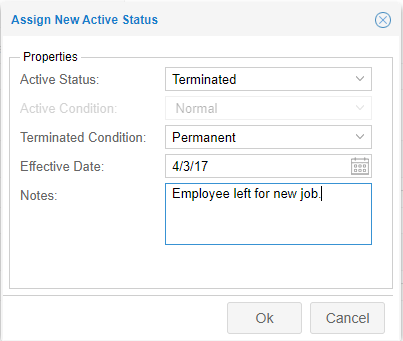
- Select Permanent in the Terminated Condition drop-down list.
- Select the effective date for termination in the Effective Date field.
- Add a note in the Notes field if needed. Click Ok.
Note: An employee’s current status can be adjusted by clicking the pencil icon. This method is recommended only for repairing status settings, such as those that might occur during import, not for terminating an employee permanently. 
Only the Change Active Status button will preserve the employee’s historical records. 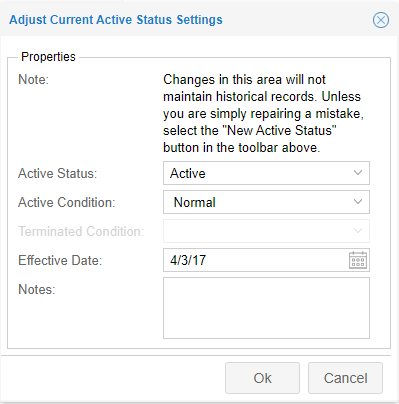
For more information about terminating an employee, download the PDF document Terminating an Employee Record.