Time Card Edits
A time card lists an employee’s schedules, punch times, workgroup transfers and deviations from the schedule. The time card allows you to easily correct or add information to ensure accurate time keeping.
You can watch the video below for a quick overview of the employee time card.
Time card edits can be made directly in employee time cards. You can use context menus to access commands, or type punch and schedule times right on the time card.
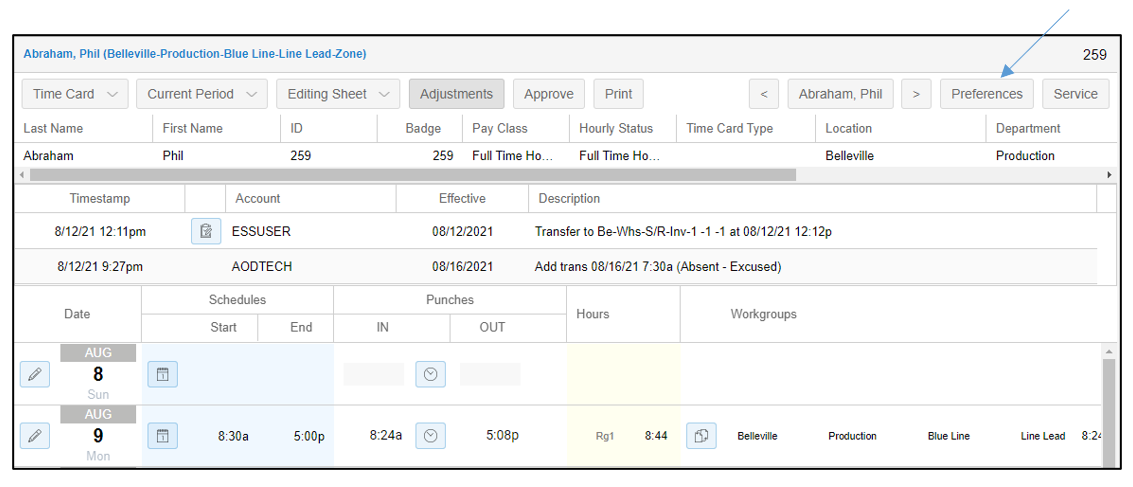
The Preferences feature for Editing Sheets in Manager Self Service (MSS) can be used to adjust the information
displayed in the sheet. The Preferences button is displayed in the header of an employee time card page in MSS.
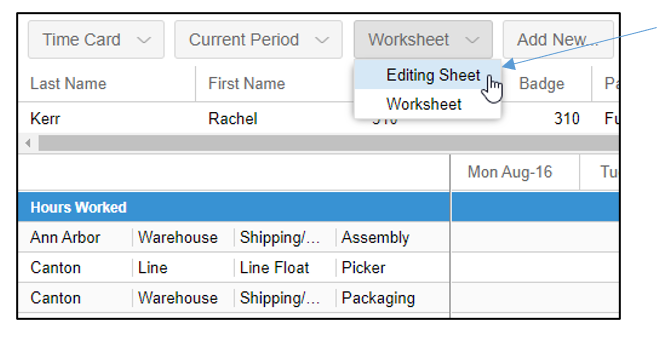
If an employee uses an alternate editing sheet, such as a worksheet, allocation sheet, time sheet or task sheet, click the editing sheet drop-down list and select the Editing Sheet option.
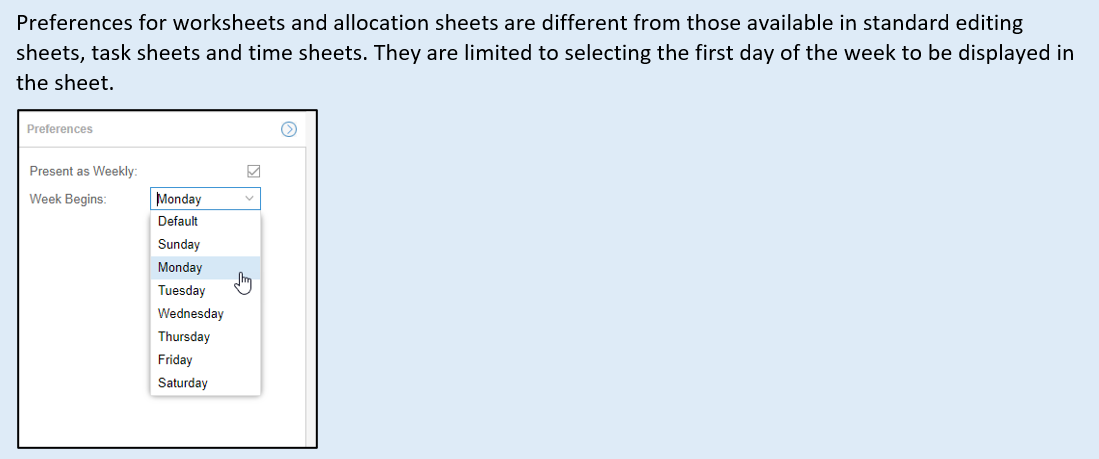
The preferences panel opens in the editing sheet page with a selection of check boxes to enable viewing options in the time card.
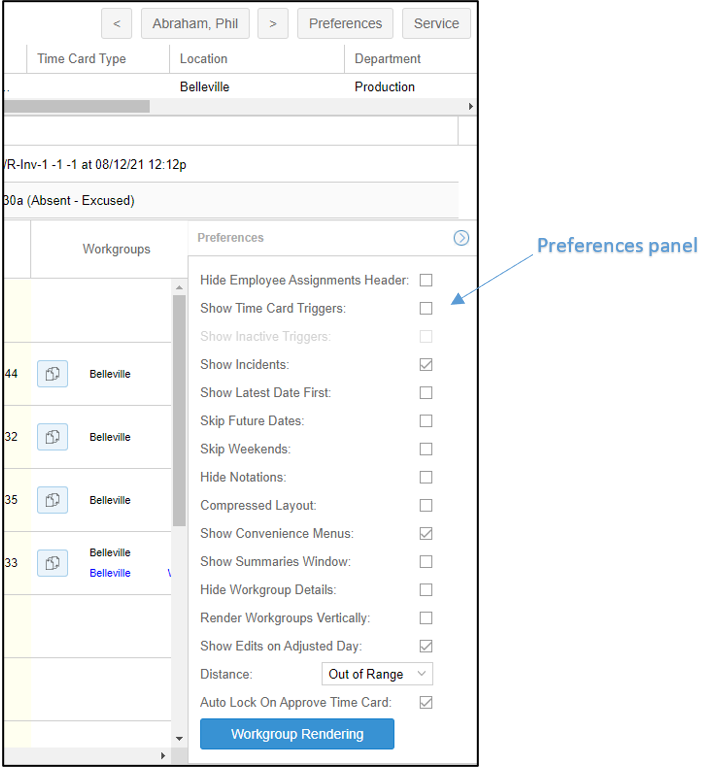
| Preference | Description |
|---|---|
| Hide Employee Assignments Header | Employee name, ID, badge number, pay class, and hourly status are hidden when this preference is enabled. 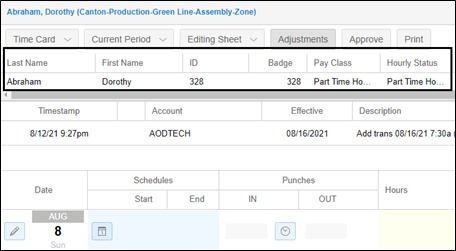 |
| Show Time Card Triggers | Displays details about a time card trigger, such as a missing punch, in the time card when this prefernce is enabled. Time card triggers are displayed in red text in the time card.  |
| Show Inactive Triggers | When time card triggers are enabled, inactive triggers can also be enabled to display in the time card. Inactive time card triggers are displayed in gray text in the time card.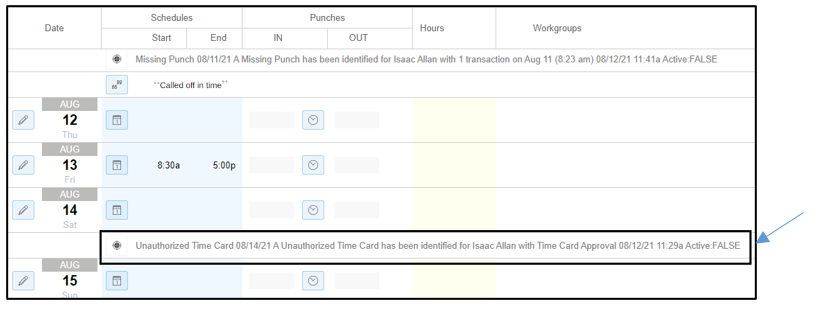 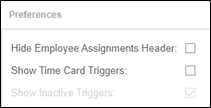 |
| Show Incidents | Incidents that result in points added to an employee’s record are displayed with a description and running point balance in the time card on the date they occur if Show Incidents is enabled. |
| Show Latest Date First | This feature reverses the order of days displayed in the time card, beginning with the last day of the pay period at the top of the time card display.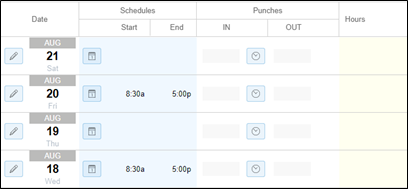 |
| Skip Future Dates | When this feature is enabled, only the days up to and including the current day of the pay period will be displayed in the time card. |
| Skip Weekends | The feature prevents weekend days from being displayed in the time card when enabled.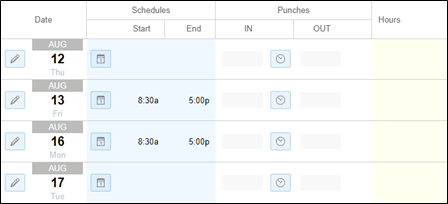 |
| Hide Notations | If notes have been added to a schedule or messages have been sent on a schedule date, they will appear beneath the day row in the time card. This feature allows you to hide these notations when enabled.  |
| Compressed Layout | Enabling the compressed layout will result is less space between day rows in the time card. This allows you to see more days in the time card without having to use the scroll bar. 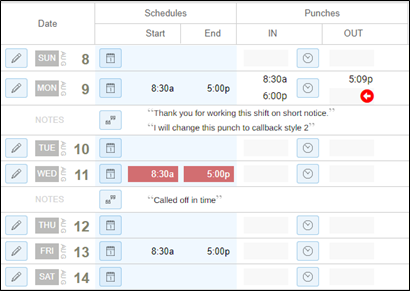 |
| Show Convenience Menus | Convenience menus let you adjust schedules and punches directly in the columns.   |
| Show Summaries Window | If enabled this feature will allow the Summaries window to display over the time card. The window’s size and placement on the screen can be adjusted. The window can be closed using the X button 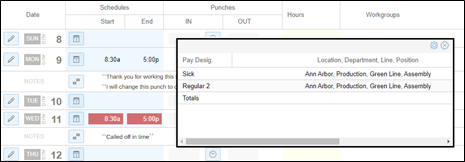 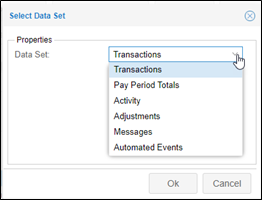 |
| Hide Workgroup Details | If enabled, the Workgroups column does not appear in the time card. 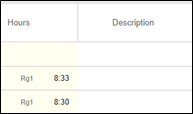  |
| Render Workgroups Vertically | Convenience menus let you adjust schedules and punches directly in the columns. 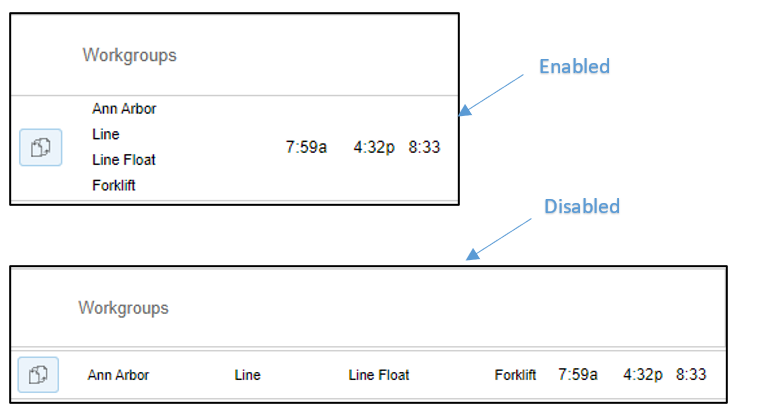 |
| Show Edits on Adjusted Day | Time card edits are displayed beneath the daily transaction in the time card if this feature is enabled. 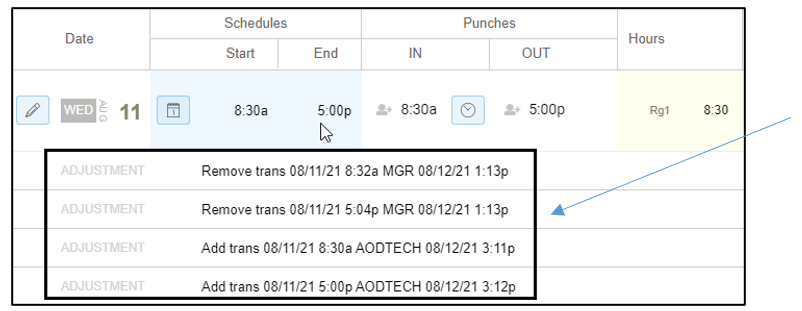 |
| Distance | Filter the distance notifications displayed on the time card to show in range only or out of range only notifications, both (All) or neither (None). 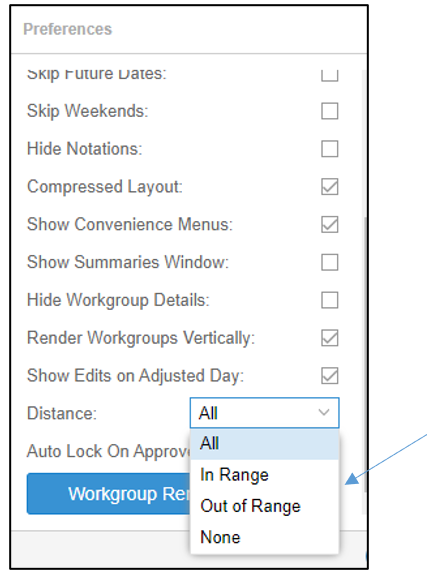  |
| Auto Lock On Approve Time Card | When this feature is enabled, the Lock Time Card check box is enabled in the Approve Time Card window. 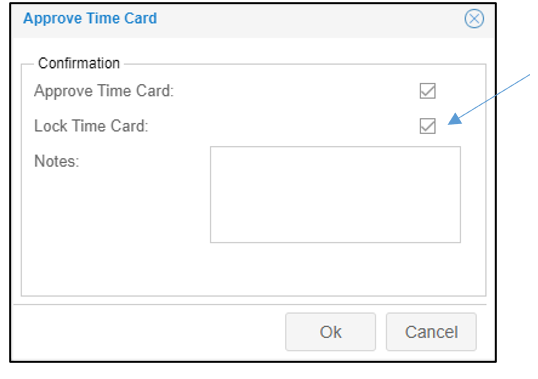 |
| Workgroup Rendering | Clicking the Workgroup Rendering button in the Preferences panel, opens a window to adjust how workgroups are displayed in the time card. 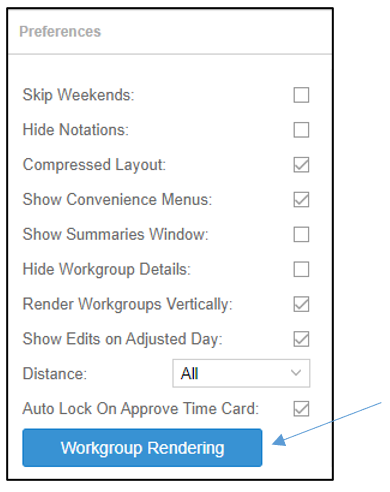 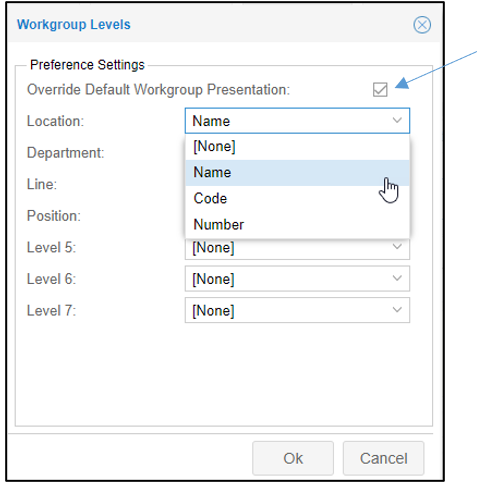 |
Download the PDF job aid here–> Editing Sheet Preferences.
A punch indicates the time when an employee starts or stops working. Employees can punch at time clocks, in ESS Desktop, or ESS Mobile. You can see the In and Out punches in the time card.
To add a punch to an employee’s time card:
Click the cell(s) where you want to add the punch.

Enter the punch time and press enter on your keyboard.
Inaccurate punches in an employee’s time card can be corrected or removed. For more information on how to add, edit, and remove punches, download the PDF Adding, Editing and Removing Time Card Punches for details.
To learn how to add multiple punches to a time card, wath the following video.
Download the PDF job aid here–> Adding, Editing and Removing Time Card Punches Job Aid
If your Manager Self Service (MSS) dashboard has a Missing Punch gauge, you can use this feature to view and address missing punches for all of the employee time cards with missing punches on that day.
To use the Missing Punch gauge in the dashboard:
Click on the Missing Punch dashboard gauge.

Click on the cell that is missing the punch.

Enter the punch time.
Press Enter on your keyboard.
Watch the video below on how to add missing punches from the To Do List.
Download the PDF job aid here–> Adding a Missing Punch from the Dashboard Job Aid
If you have added a punch to an employee’s time card, you can remove that punch using the pencil convenience menu in the time card for the date of the punch you want to remove. Select Transactions in the Convenience menu and select the Remove Punch Transaction menu item. Select the punch to remove from the list of punches that have been added on that day.
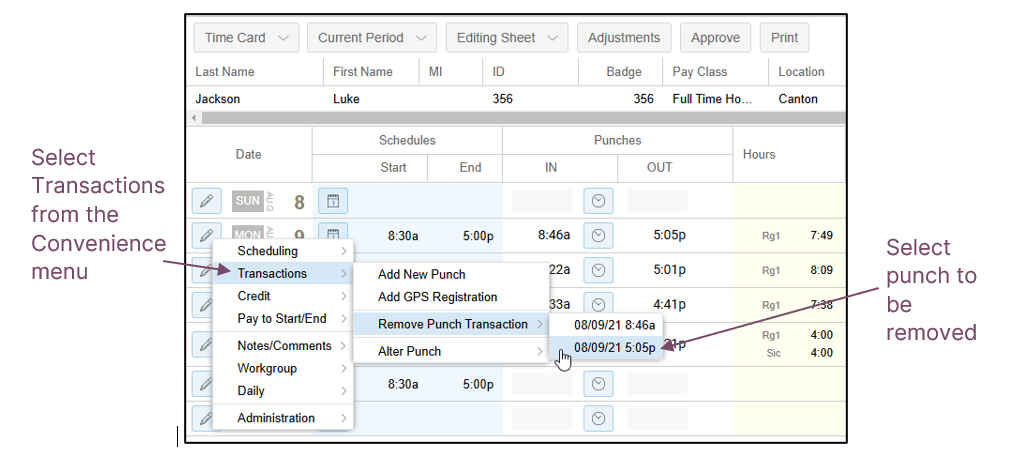
You can also remove a punch using the punch menu in the time card. Click the clock icon in the Punches column and select Remove Punch Transaction and the punch you would like to remove from the list of punches added on that day.
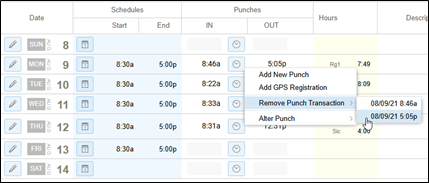
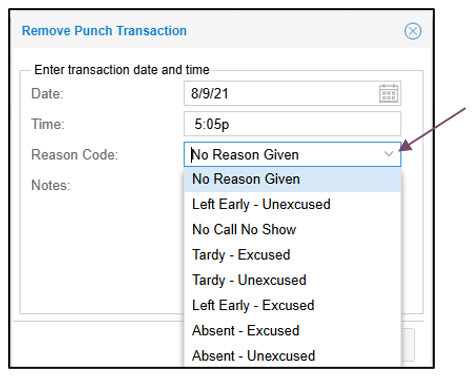
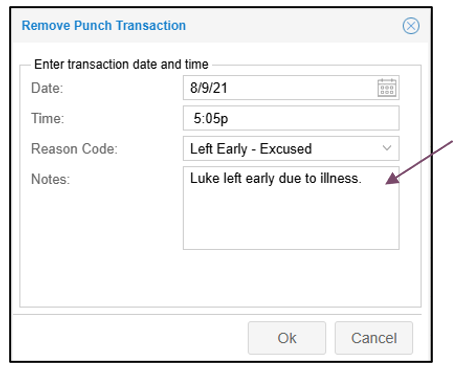
Selecting a punch from either menu will display the Remove Punch Transaction window. In the Remove Punch Transaction window, you can add a reason code and a note for the transaction.
 |  |
|---|
Download the PDF job aid here–> Removing Time Card Edits.
If you have acknowledged a time card exception, such as a tardy, a left early or absence in an employee time, you can cancel the acknowledgement directly in the time card or in the Adjustments panel.
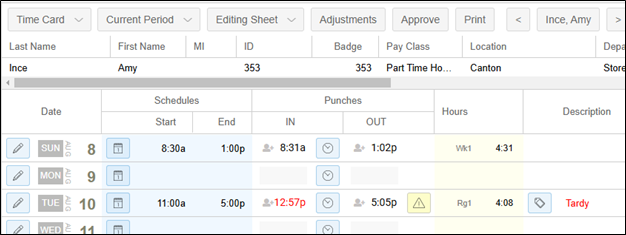


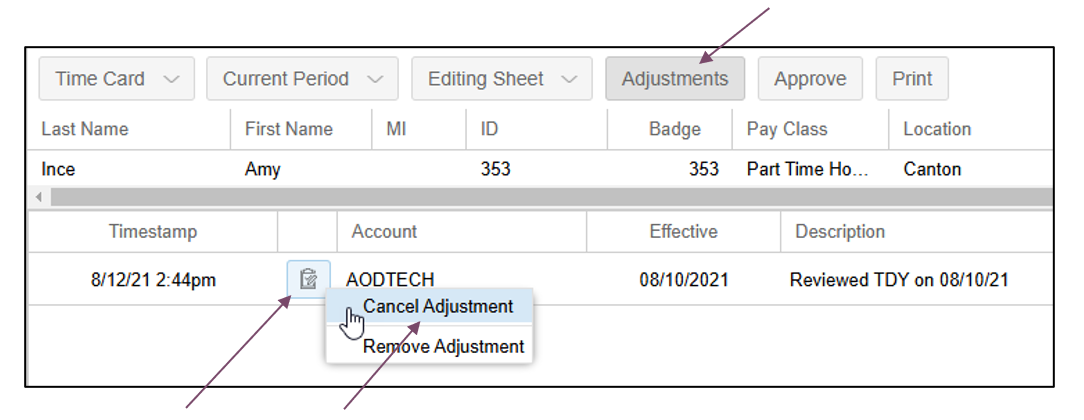
To remove the acknowledgement in the time card, select the clipboard icon for the acknowledge adjustment and select Cancel Adjustment.
Another way to remove the acknowledgement is to select the Adjustments button in the time card header. Locate the acknowledgement transaction you want to remove is the list of adjustments and click the clipboard icon for the adjustment. Click Cancel Adjustment to remove the adjustment from the list and the employee time card.
Download the PDF job aid here: Removing Acknowledgements.
Misaligned punches occur when an employee works a shift that is a lot longer than usual. The system mistakes the Out punch for the start of a new shift. You can easily designate the misaligned punch as the end of a shift.
You can watch the video below on how to fix misaligned punches.
To fix misaligned punches on an employee’s time card:
- Click the pencil icon for the day that that contains the misaligned punch.

- Click Transactions.
- Click Alter Punch.
- Click the punch time that needs to be adjusted.
- Enter the date when the employee entered the punch.

- Select End of Shift in the Transaction Alignment drop-down list
- Click OK.
Download the PDF job aid here–> Fixing Misaligned Punches Job Aid
You can credit hours to a schedule in an employee’s time card in Manager Self Service (MSS) to account for time that isn’t part of a specific shift. For example, when crediting paid time off, called benefit time, to the time card.
You can watch the video below on how to credit benefit hours.
To credit hours to a schedule in an employee’s time card:
- Click the Pencil icon.

- Click Credit.
- Click Credit Hours.
- Select the desired Pay Designation.
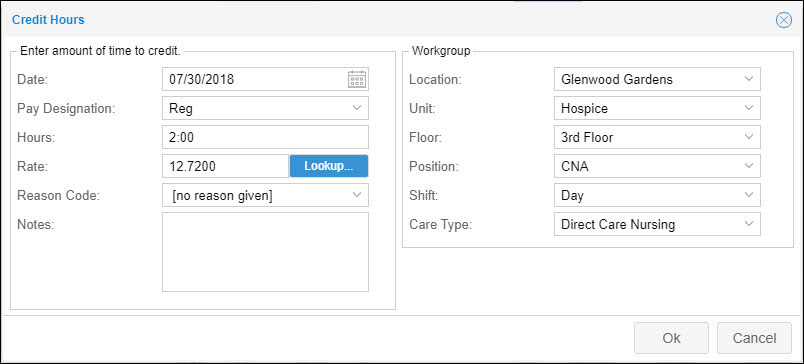
- Enter the desired amount of hours.
- Add a Reason Code or Note (If needed).
- Click OK.
Download the PDF job aid here–> Crediting Hours, Dollars and Worked Time to a Time Card Job Aid
You typically approve and lock time cards at the end of the pay period, after all critical time card issues have been resolved, in preparation for payroll processing. Locking an employee’s time card prevents further edits.
You can watch the video below on how to approve and lock time cards.
To Approve and lock an employee’s time card:
- In the employee’s time card page, click the pay period drop-down list and select Previous Period.

- Make any necessary corrections to the time card.
- Click the Approve button.
- Enable both Approve Time Card and Lock Time Card check boxes.
7

- Click OK.
The employee’s time card page will display the Approved and Locked banners indicating the time card has been locked.

Download the PDF job aid here–> Approving Time Cards Job Aid
Details about a transaction can added to an employee time card using the Note feature. Notes can be seen in the line below the transaction if this option has been enabled in the time card preferences. Notes added to the employee’s Schedules page will also be displayed in the time card.
You can watch the video below on how to add a note to a time card.
To add a note to a time card:
- Click the Pencil icon for the desired date.

- Click Notes/Comments.
- Click Add a Note.
- Enter in text in the Notes field.

- Click OK.
Download the PDF job aid here–> Adding a Note to a Time Card.
Supervisors can make adjustments for employees on the employees’ time cards. In addition to their own edits, a supervisor can review other supervisors’ edits.
See Identifying Edits by Other Supervisors for details.
Companies often guarantee a minimum amount of pay when employees are called back to work after completing an earlier shift or when employees are on-call to work as needed. This way, if employees are sent home after working only a short time, they are adequately compensated for coming in to work.
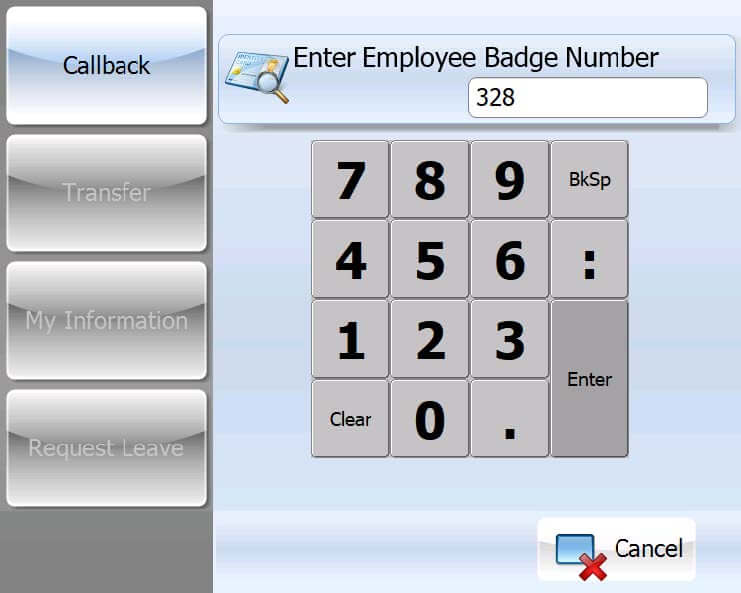
When an employee is called back to work, they can punch In using the Callback function key at the clock
or the Callback option in ESS Mobile 3.0. 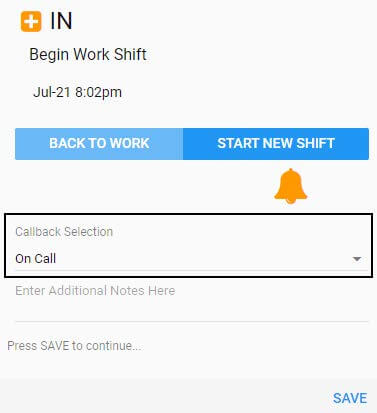
The callback style can be associated with the Punch function key to grant employees call back payment when the employee punches Out after completing the shift. On the employee’s time card, the inverted exclamation mark before the punch time indicates the callback punch.
Note: In the following screenshot, OC represents the On Call pay designation to enhance pay.
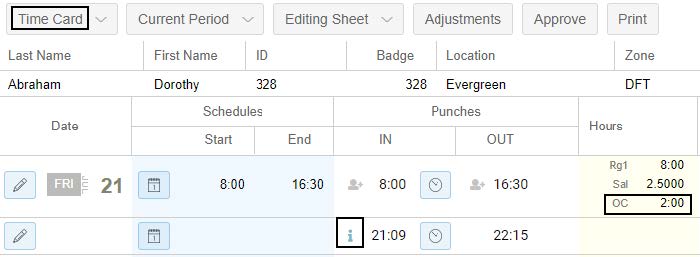
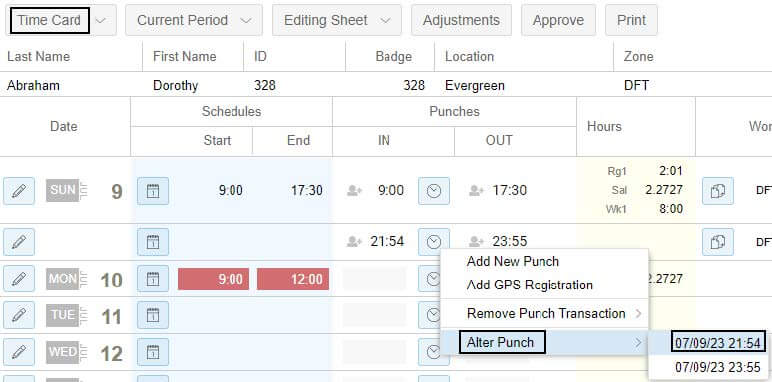
If an employee punches without using the callback punch function key, the supervisor can apply the callback rule for the employee on their time card. In the following example, the In punch 21:54 on July 9 is identified as a callback punch and the supervisor needs to apply the callback rule for this punch.
Click on the clock icon next to the In punch 21:45 and select Alter Punch, then 07/09/23 21:54. The Change Transaction dialog is displayed.
Or click on the pencil icon before the In punch 21:45 and select and select Transactions, Alter Punch, then 07/09/23 21:54. The Change Transaction dialog is displayed.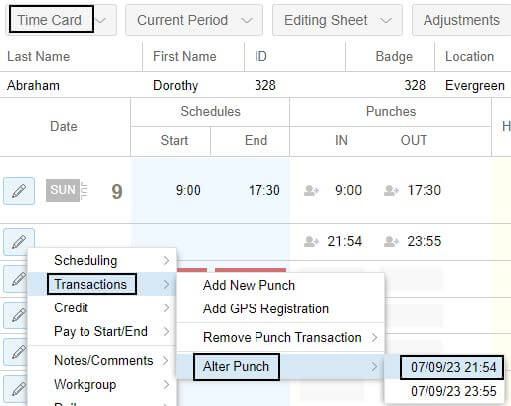
Select a callback style in the Callback Style drop-down list. In this example, On Call. Click Ok.
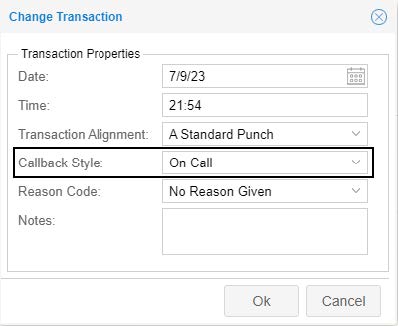
The inverted exclamation mark is added before the In punch 21:54. The OC, namely the On Call pay designation is recorded with callback worked hours.
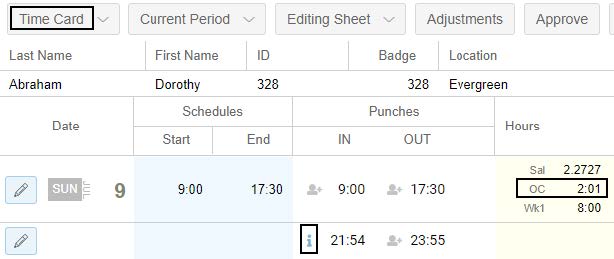
Note: The callback enhanced payment varies based on your settings. In the following example, the employee is paid one hour overtime (OT represents Over Time pay designation) when he is called back to work even just one minute.

See Applying a Callback for a Punch for details.
CMS requires a lunch be deducted if an employee works 8 hours. This document describes how LTC PBJ clients credit auto deducted lunch time back into the shift totals for employees so that PBJ CMS report can deduct 30 minutes from the shift totals and report is generated correctly.
Using the Credit Worked Time operation does not credit auto deducted lunch time back into the shift totals and the PBJ report will produce incorrect results. 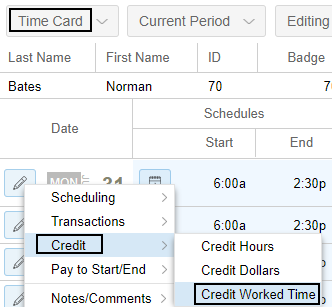
To credit lunch back:
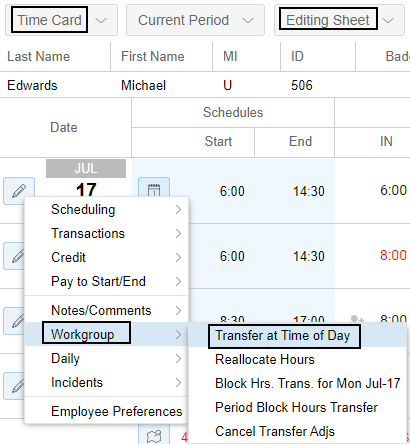
- Navigate to the Editing Sheet section of the employee’s Time Card page. On July 17, the employee worked from 6:00 to 15:00 with the total 8:30 hours and 30-minute lunch deducted. For the July 17 entry, click in the Workgroups column and select Transfer at Time of Day. The Workgroup Change @ Time of Day dialog is displayed.

Or click the Pencil icon on July 17 in the Date column and select Workgroup, then Transfer at Time of day. The Workgroup Change @ Time of Day dialog is displayed.
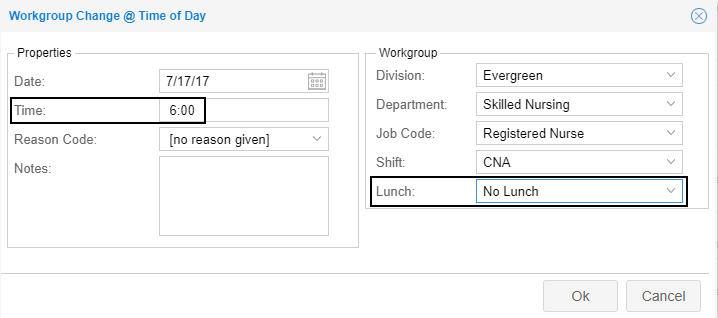
Make sure the start time of the shift 6:00 is selected in the Time field and No Lunch is selected for the Lunch workgroup level. Click Ok.
The 30-minute lunch time is credited back with the total 9:00 hours displayed. Transferred workgroup is highlighted in blue with No Lunch displayed.

No Lunch for All Shifts When an employee never has time for lunch and shouldn’t get deduction for pay, but CMS would have the lunch deduction for PBJ purpose, you can specify the following settings.
Navigate to the employee’s time card page. Select Personal Information in the first drop-down list and Workgroup in the second drop-down list. Click the Pencil icon for the current workgroup assignment. The Adjust Current Home Workgroup Settings dialog is displayed.

Make sure No Lunch is selected for the Lunch workgroup level. Specify an effective date in the Effective Beginning field. The following selection indicates there would not have lunch deductions in their shifts for pay starting 7/22/2020. Click Ok.
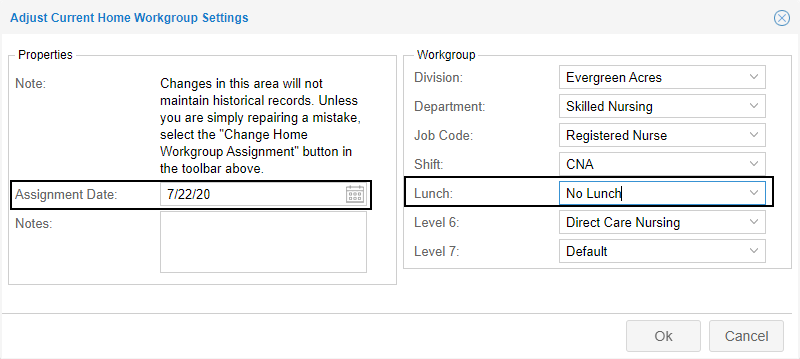
No Lunch is updated in the Lunch column and the effective date is updated in the Effective column.

See Crediting Lunch Back for PBJ Clients for details.
A schedule can be added to an employee’s time card using either the Pencil icon menu or the convenience menu if this preference has been enabled.
See Adding Schedules to a Time Card for details.
When an employee with scheduled start and end times punches later or earlier than the scheduled time, the system will handle the punch as either tardy or left early. If the tardy or left early is a result of a work related activity that prevents the employee from punching at the scheduled time, you can prompt the system to pay the employee for the worked time by using a Pay to Start/End option in the Pencil icon menu of the editing sheet. Employee punches that reflect actual worked time should not be modified. Modifying punches that represent actual worked time could result in legal liabilities. The options to pay to scheduled or actual start or end are used to adjust the total hours in the editing sheet, not the actual IN and OUT punches.
See Adjusting Pay to Scheduled or Actual Start/End Times for details.