Allocation Sheet
Allocation sheets are designed for employees who punch in and out using a time clock, a Kiosk, ESS or ESS Mobile and frequently transfer to different workgroups. The sheets allow employees to assign their worked time to different workgroups without having to punch in and out each time they change workgroups.
Allocation sheet data is displayed in rows of workgroups and absences with columns for schedules. Worked hours are assigned to the workgroups by the employee by entering the time in the appropriate cell for workgroup and date of shift. 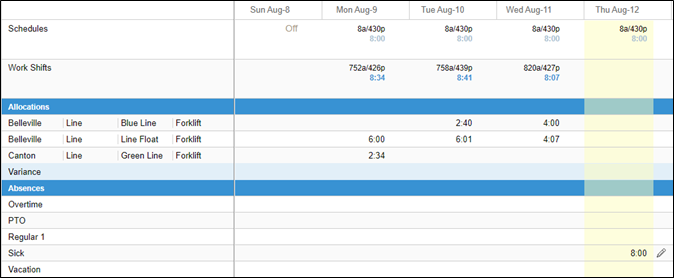
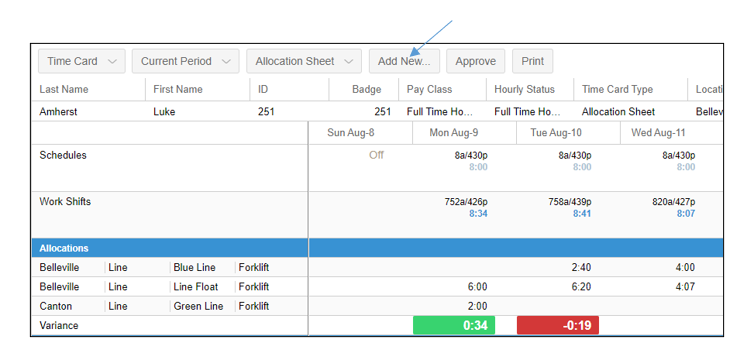
The total number of hours allocated for each workgroup should be equivalent to the total punched hours received by the kiosk, ESS Mobile, ESS or a clock (displayed in the Work Shifts row). The Variance row indicates inconsistencies between the total hours distributed among workgroups and the punch total. The amount of time over or under allocated is displayed with either a green highlight (over-allocated) or red highlight (under-allocated). 
Adding a Workgroup to an Allocation Sheet
For employees who work in more than one workgroup, each workgroup can be added to the allocation sheet to allow hours to be entered for the appropriate workgroup.
To add a workgroup to an allocation sheet:
Click the Add New button in the allocation sheet header.
Select the new workgroup levels for the workgroup to be added in the Add a new Workgroup Set window.
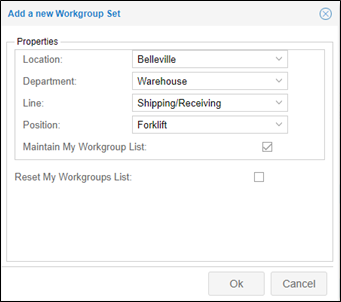
Enable the Maintain My Workgroup List checkbox if you want the new workgroup to remain in the allocation sheet permanently. If this option is not enabled, the workgroup will be automatically be removed from the sheet within two pay periods if not used.
Enable the Reset My Workgroups List checkbox if you want the workgroup to remain on the employee’s allocation sheets going forward.
The new workgroup will appear in the Allocations section of the sheet. 
Allocation Sheet Preferences
You can adjust how the allocation sheet is displayed by clicking the Preferences button in the sheet header. 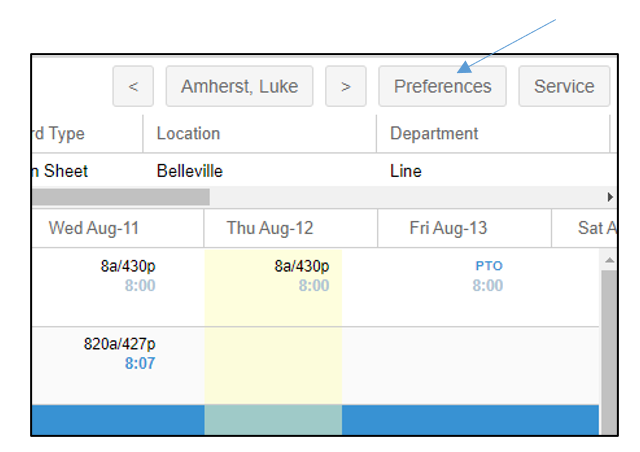
Select the day you want to be displayed as the first day of the allocation sheet week from the Week Begins drop-down list in the Preferences panel. The Present as Weekly checkbox must be enabled to select the day the week begins. 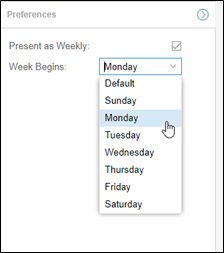
Enable the Present as Weekly checkbox to activate the weekly selection button, which allows you to switch between the previous, current and next week allocation sheets. The allocation sheet is displayed with a weekly summary in the Period column. When changing the weekly period, the week begins selection you have chosen will revert to the default (Sunday) setting. 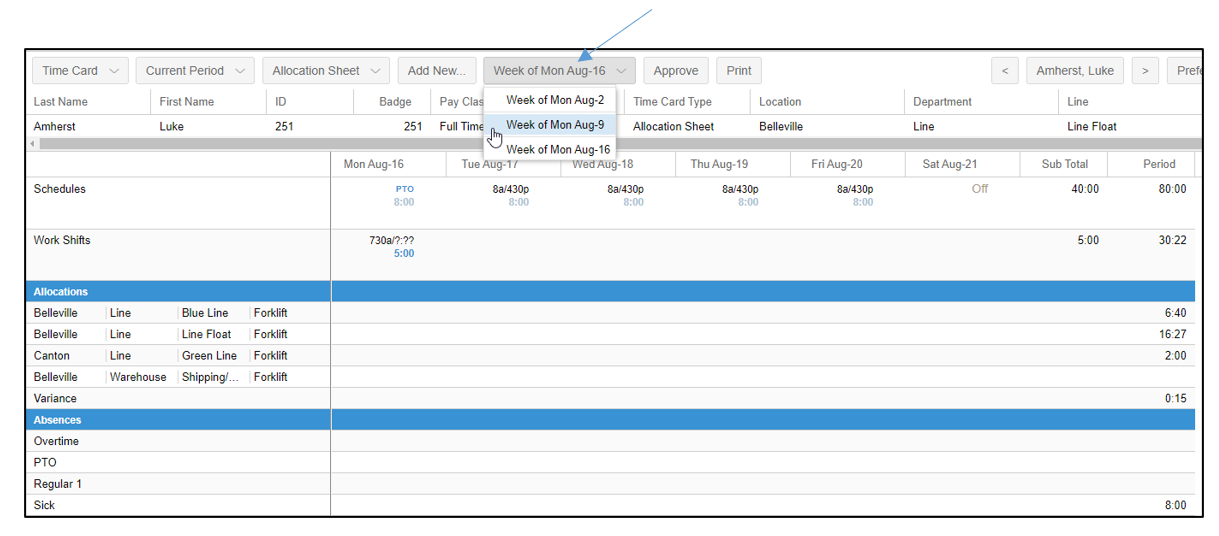
Download the PDF job aid here–> Using Allocation Sheet .