Schedule Change Request
Open schedules are upcoming schedules that have not been assigned to employees. Supervisors can locate available employees to fulfill open schedules.
Watch the video below on how to manage open schedules.
Employee call off requests trigger a Call Off banner in the Visual Scheduling template, indicating that the request is waiting for manager approval.

Watch the video below on how to manage a call off request.
To respond to an employee request to call off a shift:
- Click on the Call Off Notice banner in the schedule template.
- Click Call Offs Show Detail.
- Click Approve or Deny in the Pending Call Offs panel for each employee.

- Click Save.
After approving a call off, you can add a replacement employee by:
- Adding a Candidate to an Open Schedule
- Using Escalate Search
See Managing Schedule Call Offs for details.
Employees who are absent from their shift and who have not sent a call off notice or schedule drop request will trigger a No Show in the schedule template. No Shows are indicated by a blue banner and a number box indicating the number of No Shows for that coverage schedule.

Watch the video below on how to manage employee no shows.
To address No Shows in your Schedule.
- Click on the No Show icon
- Click Release with Penalty The employee will be removed from the coverage schedule, but will retain their work schedule on their time card so that the absence is tracked. Or
- Click on the No Show icon
- Click Release with Penalty and Separate Schedules The employee will be removed from the coverage schedule, but will retain their work schedule on their time card so that the absence is tracked. Additionally, a separate coverage schedule will be created so that a replacement employee can be found and added to replace the no show.
See Managing Schedule No Shows for details.
A schedule template that is configured to allow employees to pick up open schedules may also require manager approval of this action. If your system requires approval of schedule pickups, you can address these from the schedule template.

Watch the video below on how to address schedule drops.
To respond to a pickup request and view details about the request, you can select the Pickups Request banner in the schedule template:
- Click the Pickup Requests banner.
- Select Approve All Pickups. Or
- Click the Pickup Requests banner.
- Select Show Details to open the Pending Pickups panel.

- Click either the Approve or Deny button in the employee tile.
- Click the Save button in the Pending Pickups panel.
A schedule template that is configured to allow employees to drop schedules may also require manager approval of this action. If your system requires approval of schedule drops, you can address these from the schedule template.

To respond to a drop request and view details about the request, you can select the Drop Requests banner in the schedule template:
- Click the Drop Requests banner.
- Select Approve All Drops. Or
- Click the Drop Requests banner.
- Select Show Details to open the Pending Drops panel.

- Click either the Approve or Deny button in the employee tile.
- Click the Save button in the Pending Drops panel.
See Managing Schedule Pickups and Drops for details.
When the employee submits a trade request for manager approval, the request will appear in your To Do List in Manager Self Service (MSS) as a Schedule Change Request. Work schedule trade details, such as dates, schedule times and employees who are offering to trade or pick up the schedule are displayed in the Schedule Change Request panel with buttons to approve or deny the request.

- Click on your To Do List icon.
- Click on the Schedule Trade Request that you would like to address.
- Review the trade request details.

- Click either Approve This Offer or Reject Schedule Change Request.
- Enable the Approve Trade checkbox.
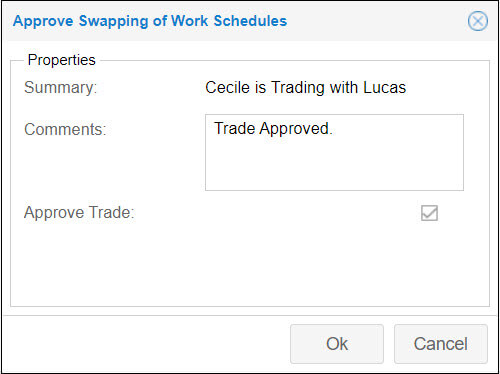
- Enter a note (if needed) in the Comments field.
- Click OK.
See Managing Work Schedule Trades for details.
Schedule confirmation requires employees to respond to a notification requesting confirmation of the date and time of their work schedules. Schedule confirmation can be added to a coverage schedule’s properties in the Visual Scheduling template. Employees who are assigned to the coverage schedule and required to confirm their schedules based on their ESS profile will receive the confirmation notification via email, the ESS Mobile App and/or a text message. Schedule confirmation can also be required for employees who have schedules created using a schedule pattern if their ESS profile has participation in schedule pattern confirmation added.
Adding a Schedule Confirmation to Coverage Schedule
To add schedule confirmation to a coverage schedule:
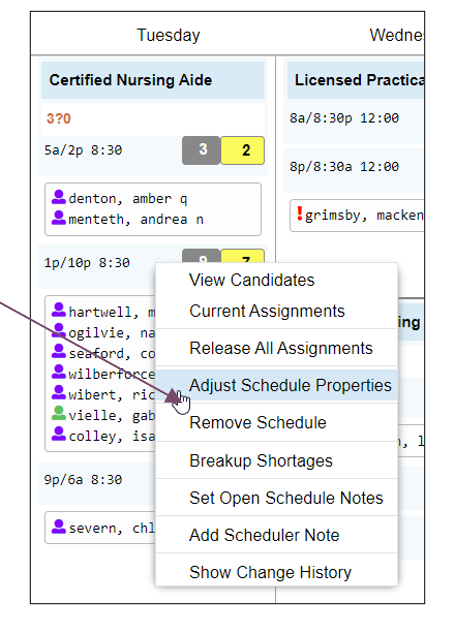
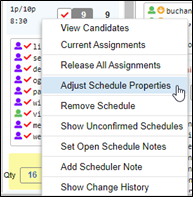
- Click the coverage schedule in the template and select Adjust Schedule Properties.
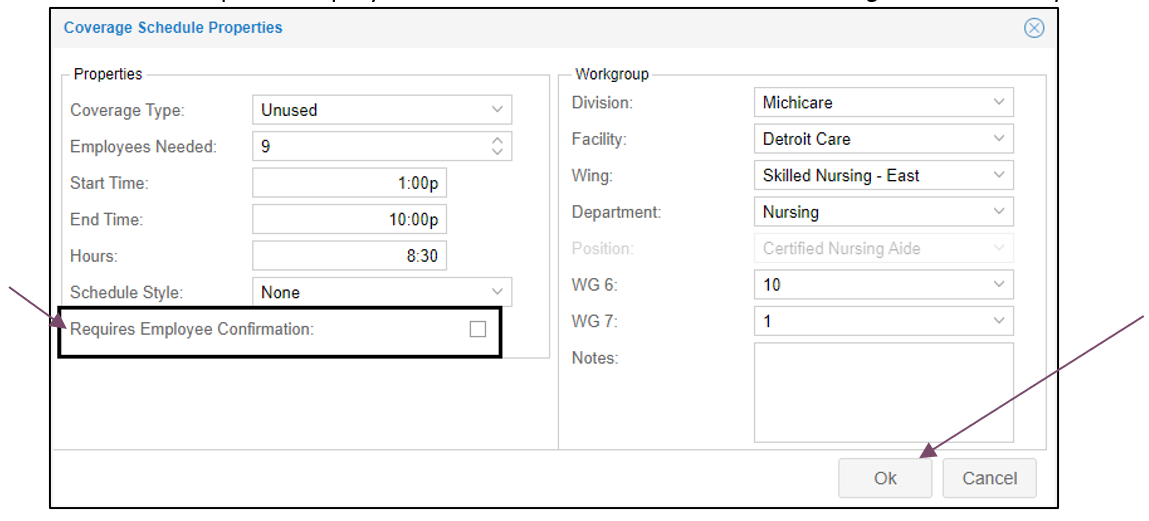
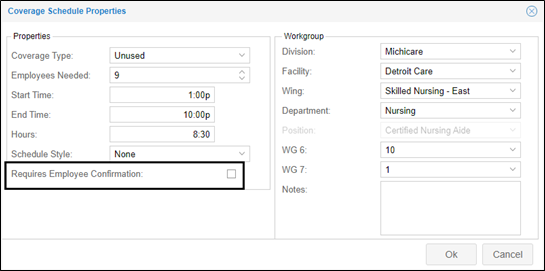
- Enable the Requires Employee Confirmation check box in the Coverage Schedule Properties window.
- Click the OK button.
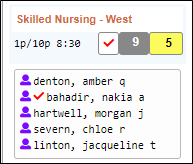
A coverage schedule with confirmation enabled will display red check marks for the work position, coverage schedule and participating employees assigned to the coverage schedule in the schedule template. 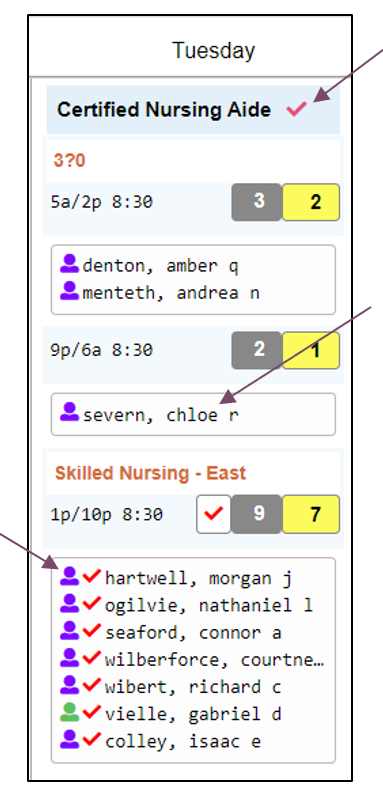
The employee’s work schedules requiring confirmation are also displayed on the employee’s Schedules page with a red check mark.
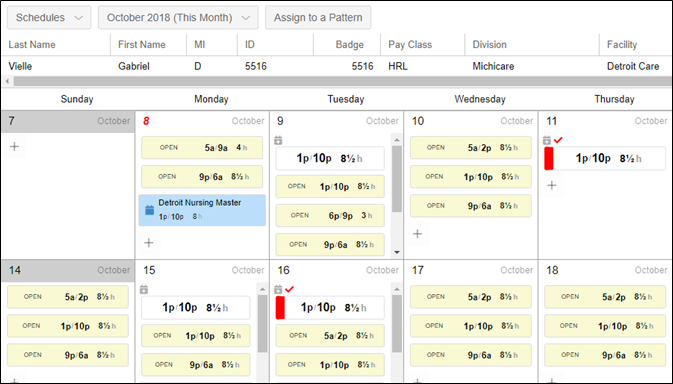
Employees assigned to the coverage schedule who do not have their ESS profile enabled for schedule confirmation will not be required to confirm their schedule. Those employees will not have a red check mark next to their name in the schedule template.
In addition, employees with schedule patterns who are assigned to a coverage schedule with schedule confirmation enabled, will not be required to confirm their schedules if their ESS profile is not enabled for schedule patterns participating in the schedule confirmation process.
Removing a Schedule Confirmation from a Coverage Schedule
If a coverage schedule no longer requires employee confirmation, you can cancel the request by clicking the coverage schedule and selecting the Adjust Schedule Properties menu item.
Disable the Requires Employee Confirmation check box in the Coverage Schedule Properties window.
If the Remove Requirements to Confirm Schedule notification is enabled, the employees who are assigned to this coverage schedule will receive a notification via Email, ESS Mobile App and/or Text.

Employee Notifications
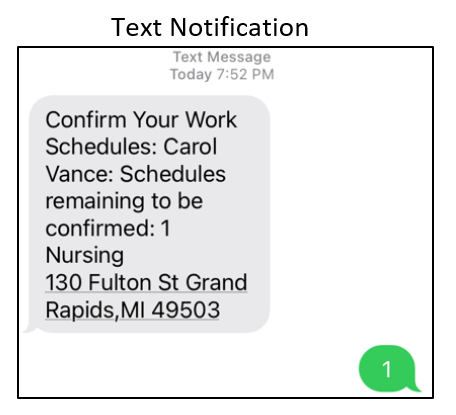
Employees required to confirm a schedule will receive the schedule confirmation notification via email, text and/or ESS Mobile app.
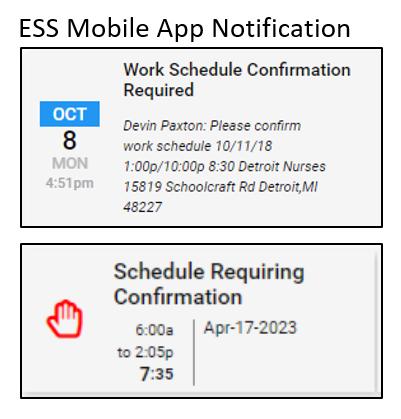
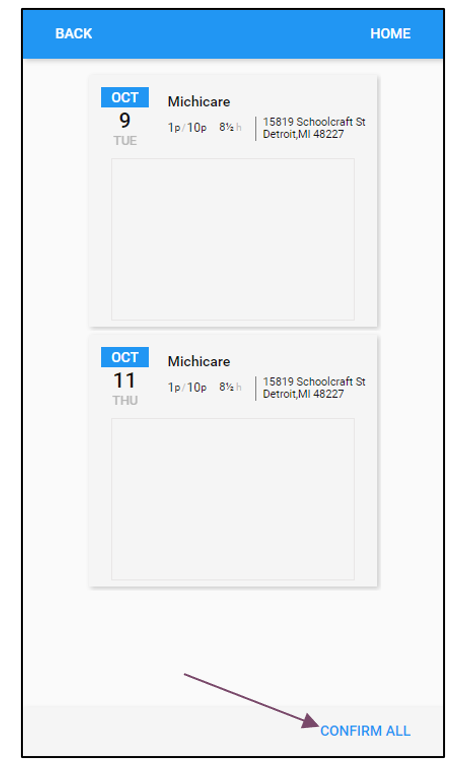
The schedule confirmation notification in the ESS Mobile app will be displayed in the home screen. Click the notification to view the Work Schedule Details screen with the Confirm Work Schedule button. Click the button to confirm the schedule.
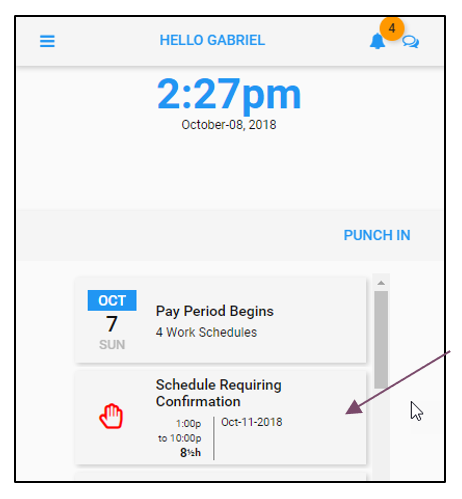
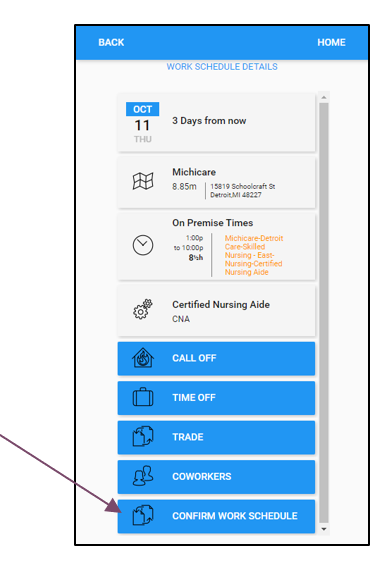
If more than one schedule requires confirmation, all schedules can be confirmed simultaneously by clicking CONFIRM ALL. To confirm work schedules individually, click a work schedule to view the Work Schedule Details screen and click the Confirm Work Schedule button.
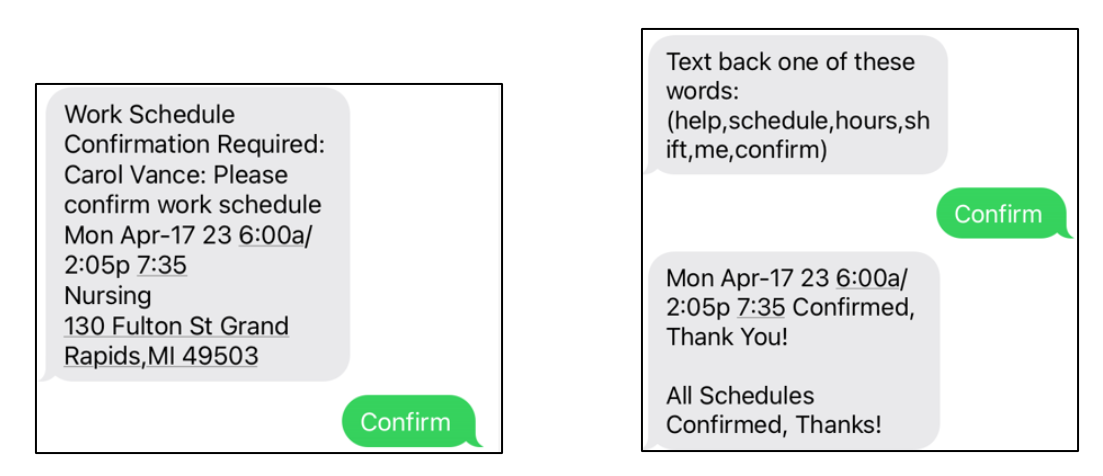
Employees can confirm a work schedule by texting back any of the following words:
- confirm
- help
- schedule
- hours
- shift
- me
Confirming Work Schedule on Behalf of an Employee
Schedulers who have operator access to the schedule template have the authority to confirm employee schedules on behalf of the employee.
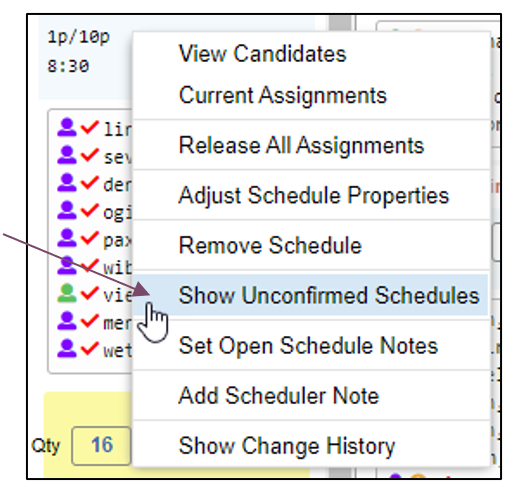
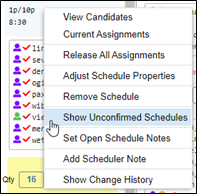
To confirm an employee’s work schedule, click a coverage schedule and select the Show Unconfirmed Schedules menu item.
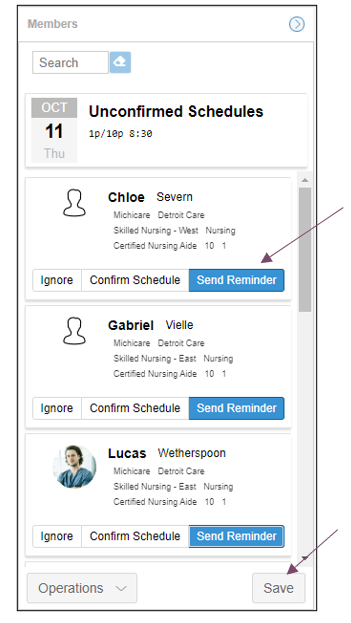
In the Members panel, tap the Confirm Schedule button in the employee’s tile and click the Save button.
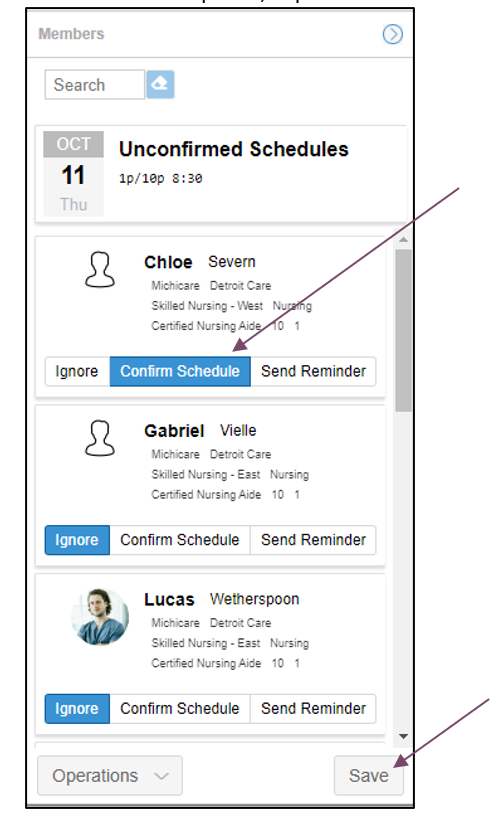
Employees who have confirmed their schedule or who have had their schedules confirmed by a supervisor will no longer have a red check mark next to their name in the schedule template.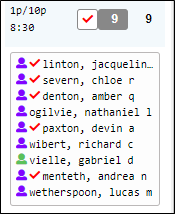
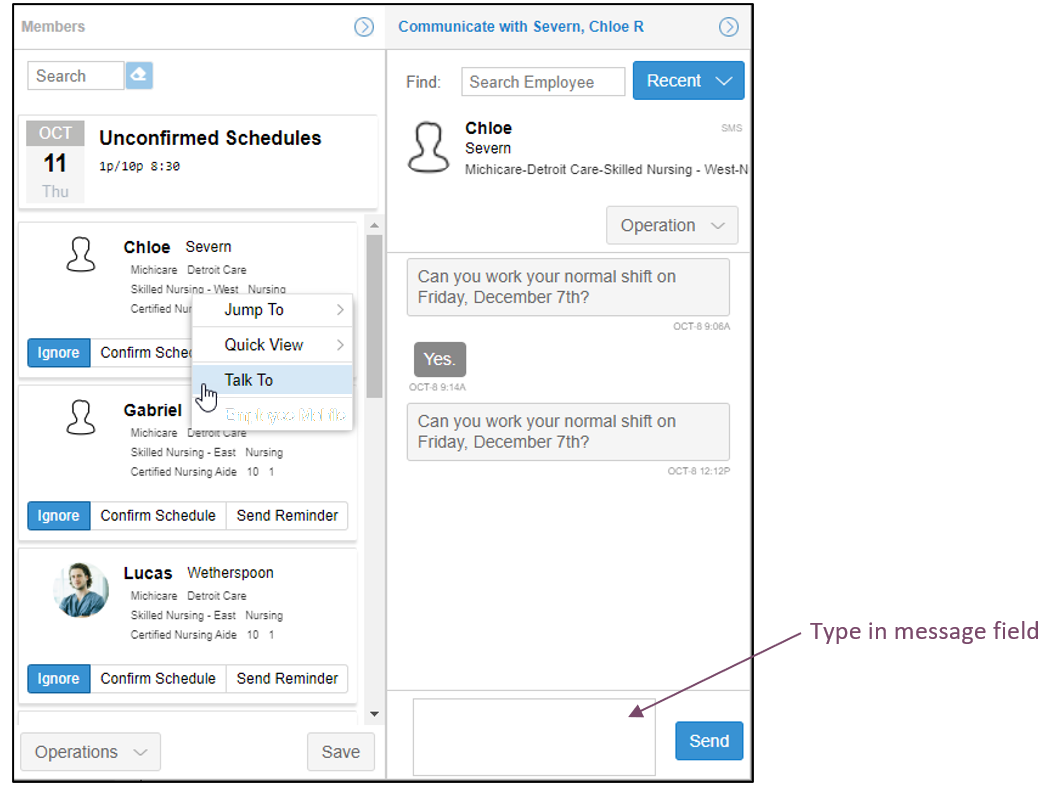
If you would like to check with an employee before confirming the employee’s schedule, you can message the employee directly from the template by clicking the employee’s tile and selecting the Talk To menu item. Type in the message field and click the Send button.
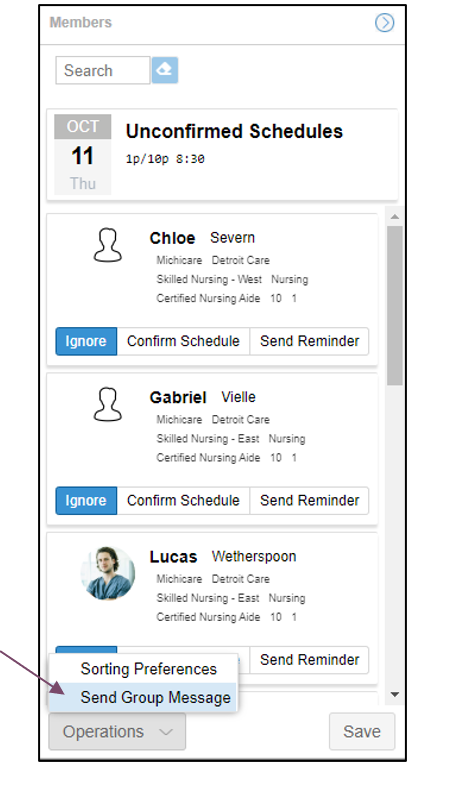
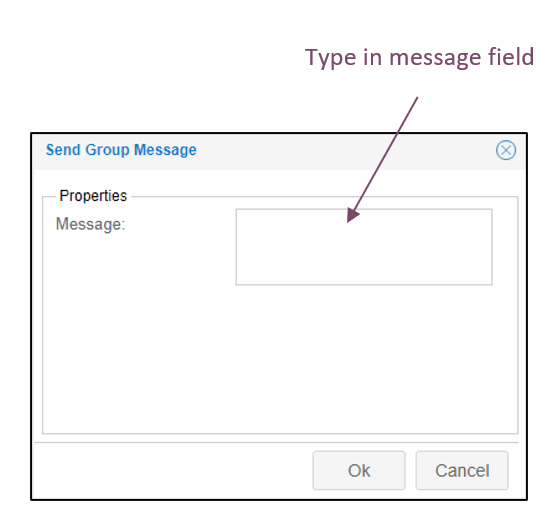
You can also send a group message to all unconfirmed employees by clicking the Operations button in the Members panel and selecting Group Message.
Sending Employees Confirmation Reminders
In the schedule template, you can send a reminder to employees to confirm their work schedules. To send a confirmation reminder, click the coverage schedule and select Show Unconfirmed Schedules.
Click the Send Reminder button in each employee tile and click the Save button in the Members panel.
Download a printable version of Managing Schedule Confirmations for details.